This page contains reviews of NIKKOR Z MC 50mm f/2.8.
Lens Summary


| Price | It's not cheap. |
| Size | Good portability |
| Weight | Good portability |
| Ease of use | minimum requirement |
| AF performance | Not at top speed |
| Resolution performance | Very good |
| Bokeh | It's not my strong point. |
| chromatic aberration | Very good |
| distortion | Very good |
| coma aberration | Slightly remaining in the corner |
| Vignetting | It is noticeable at infinity. |
| flare resistance | Good |
| Overall evaluation | Ideal for walking macros |
Evaluation:
It has few optical weaknesses and is finished with high-performance micro-lenses like the Z MC 105mm F2.8. It is small and lightweight, and although it is high-performance, it is excellent for portability, but it uses a focusing mechanism that extends the inner barrel as a compromise. By purchasing it with an understanding of the inner barrel protection and working distance, it will become a satisfying walking macro lens.
Foreword
- Release Date:2021.6.2
- Product page
- My Flickr album
- Flickr Group Page
- Japanese user contribution site
- B&H photo
- Adorama
This is one of the first micro lenses for the NIKKOR Z, which appeared in the middle of 2021. Unlike the other micro lens, the ‘NIKKOR Z MC 105mm f/2.8 VR S’, this is a non-S-Line, unmarked lens. It has a reasonable price and a compact design that is easy to carry around, and it is compatible with 1:1 macro photography that covers a standard angle of view that is easy to handle.
At 66mm in length and 260g in weight, this is a compact and lightweight standard macro lens, and when compared to the AF-S Micro NIKKOR 60mm f/2.8G ED for SLR cameras, you can see that both the size and weight (89mm, 425g) have been kept down. It can be said that this is a micro lens that is compatible with the highly portable mirrorless cameras. However, unlike other micro lenses, it has a structure in which the inner barrel extends forward when focusing. You must be careful when handling it, including dustproofing and drip-proofing and working distance.
specifications
| lens mount | Nikon Z |
| Supported sensor size | Full frame |
| focal length | 50mm |
| Lens construction | 10 lenses in 7 groups |
| Aperture | F2.8-5.6 - F22-F32 |
| Aperture blades | 9枚 |
| Minimum focusing distance | 0.16m |
| Maximum magnification | ×1.0 |
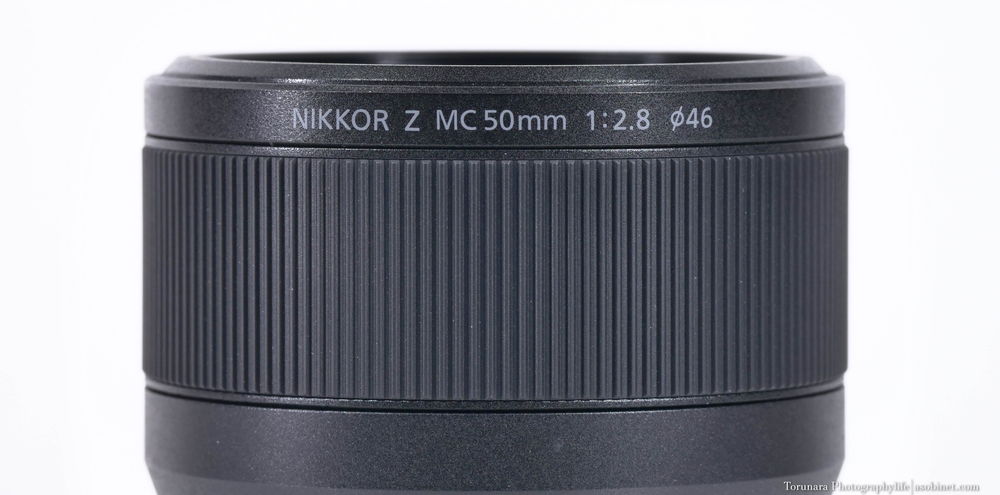
| Filter diameter | 46mm |
| image stabilisation | - |
| Teleconversion lens | - |
| Coating | Super-Ingrated Coating |
| Size | φ74.5×66mm |
| Weight | 260g |
| weather sealing | Support |
| AF | Stepping motor |
| Aperture ring | - |
| Other controls | - |
| Accessories | Lens cap 46mm LC-46B (spring type) Rear cover LF-N1 HN-41 Lens case CL-C1 |
NIKKOR Z MC 50mm f/2.8 Review
Appearance and operability
Boxes and accessories
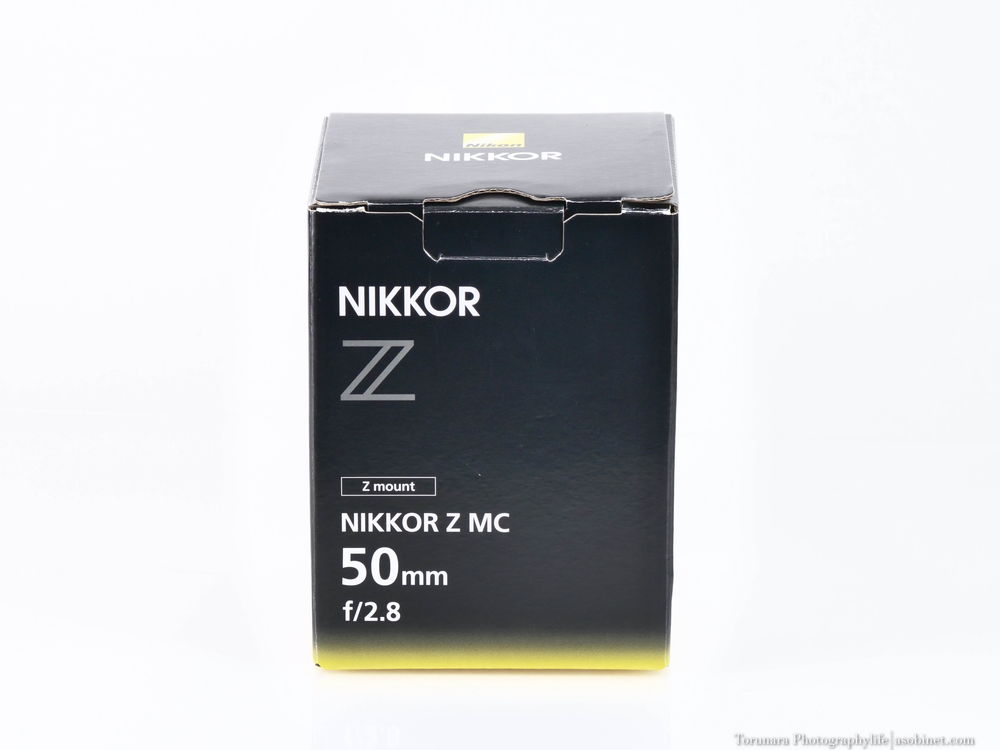
The box has a unique design with a black base and yellow accents, in the style of the NIKKOR Z series. Compared to the design of SLR lenses, it seems to have a simpler, more modern design.
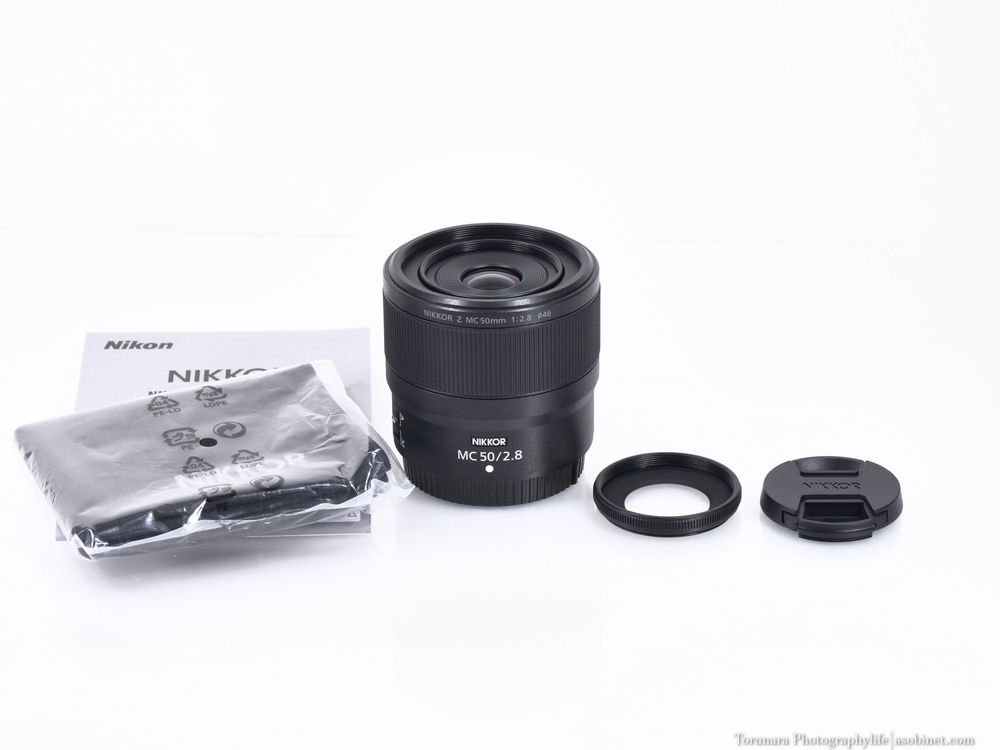
In addition to the lens itself, a hood, cap and thin wrapping cloth are included. It's the minimum you need, but the fact that a lens hood is included makes it more conscientious than Canon's.
Appearance
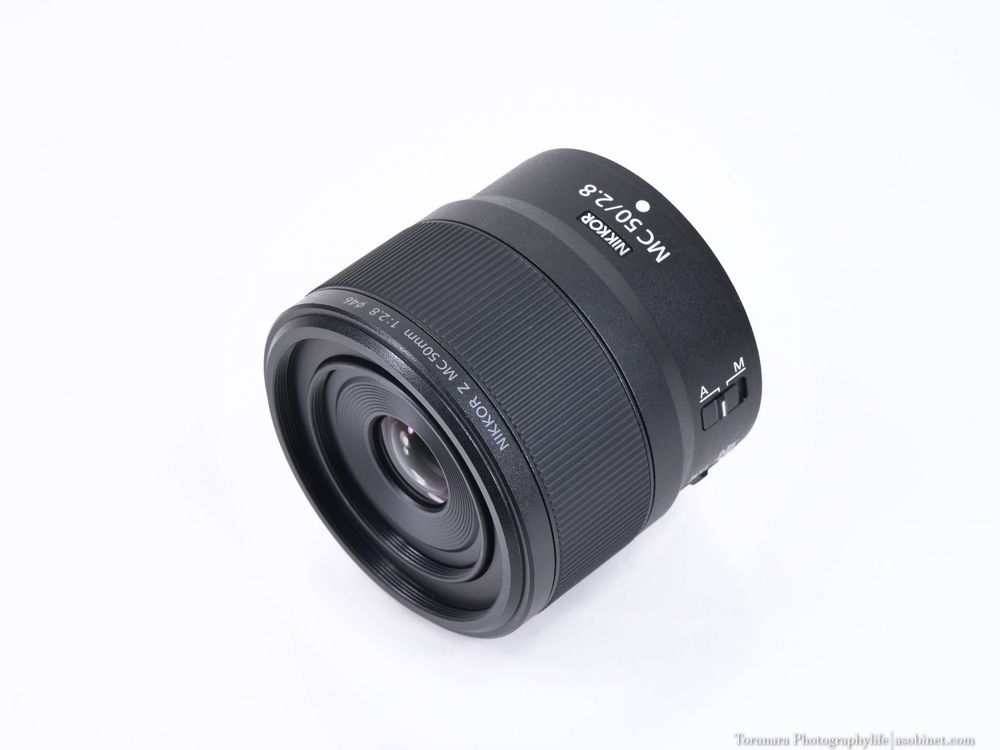
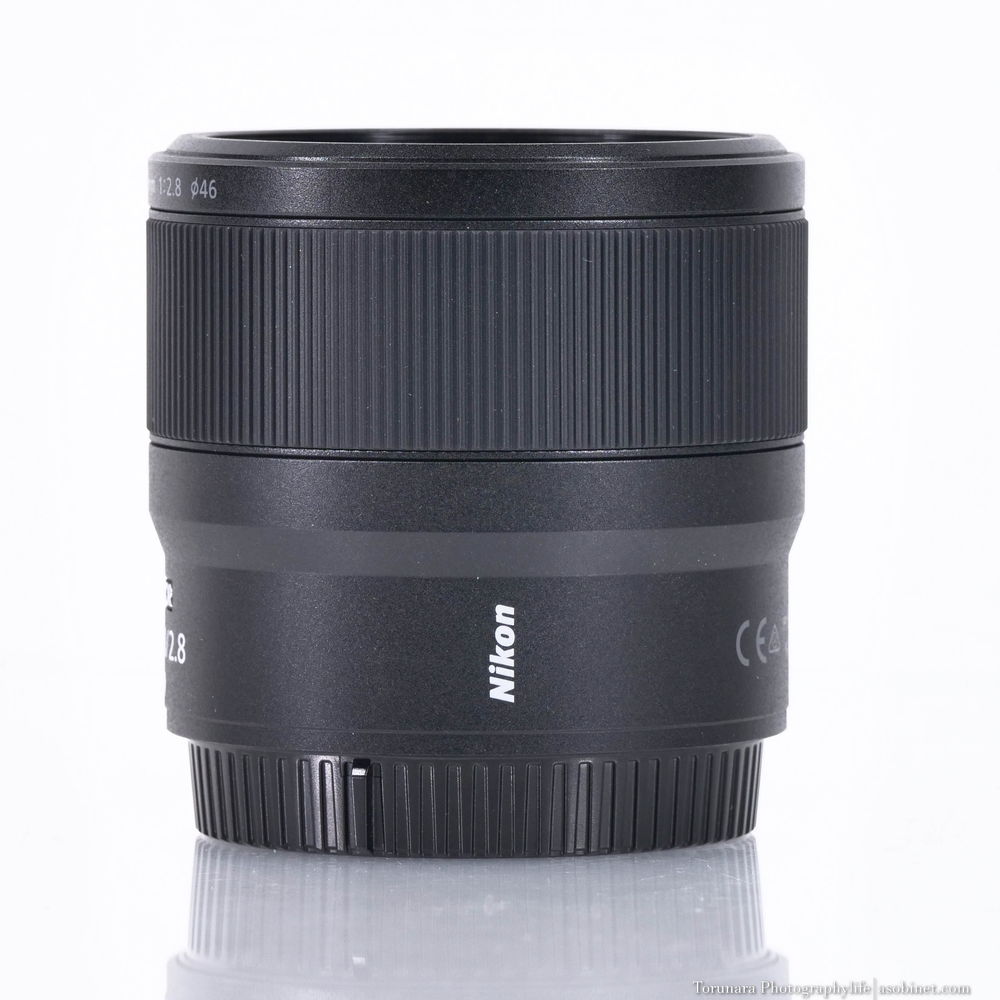
The exterior is made from sturdy plastic parts throughout, and the focus ring is made from rubber. It doesn't have a luxurious feel, but it doesn't feel like it's made in a way that would compromise its reliability. The entire body is coated in black paint to make it resistant to scratches and fingerprints.
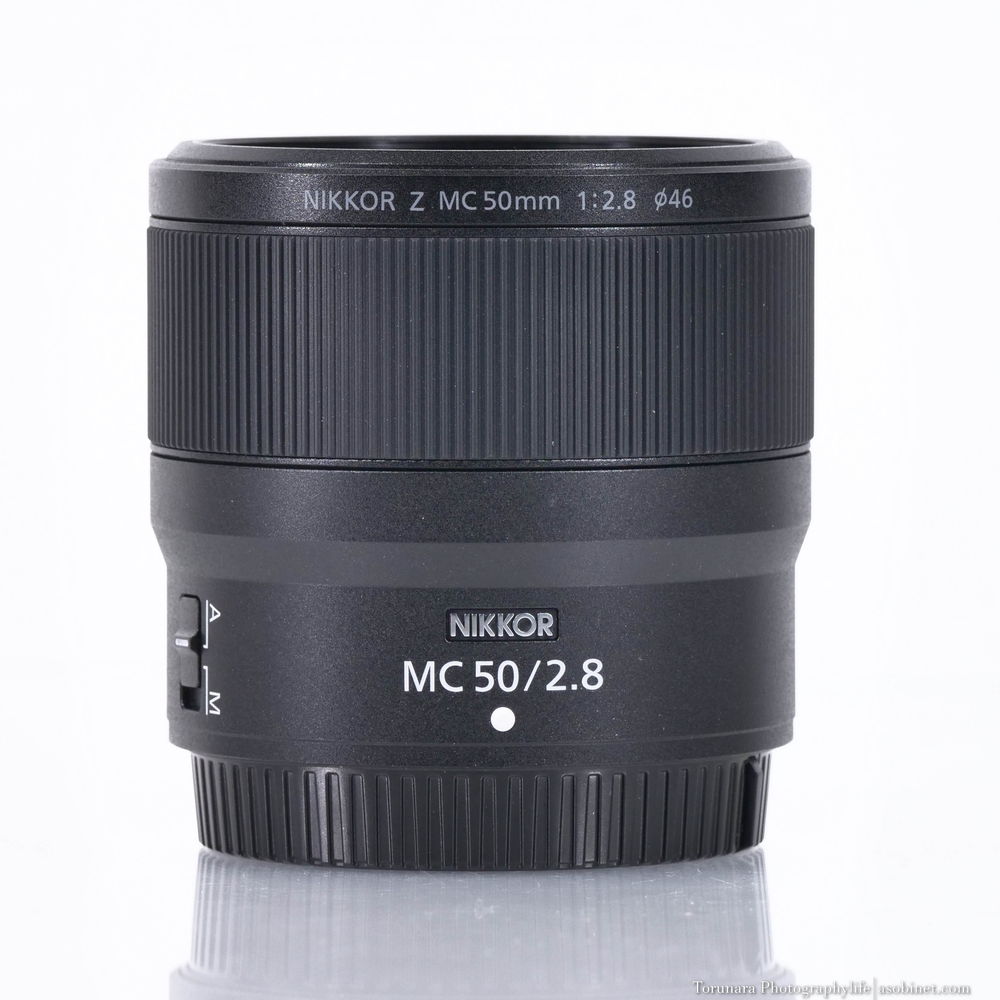
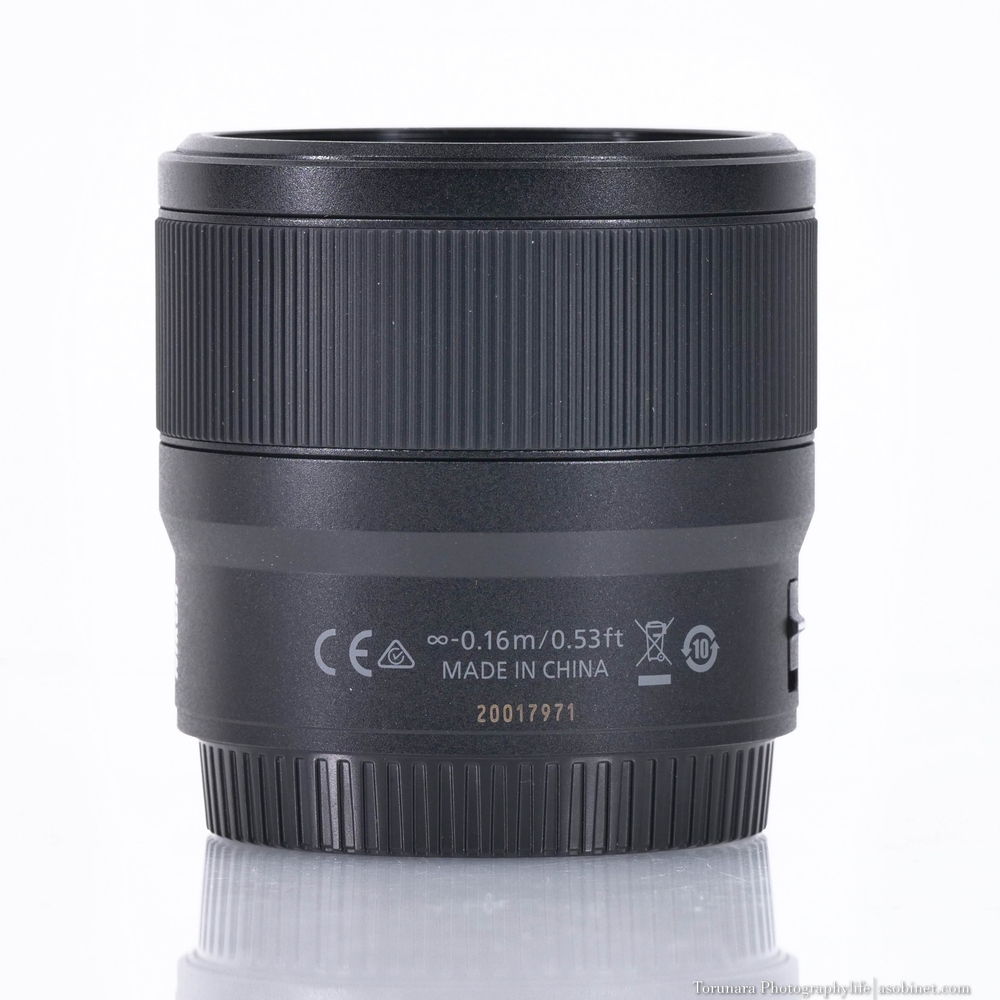
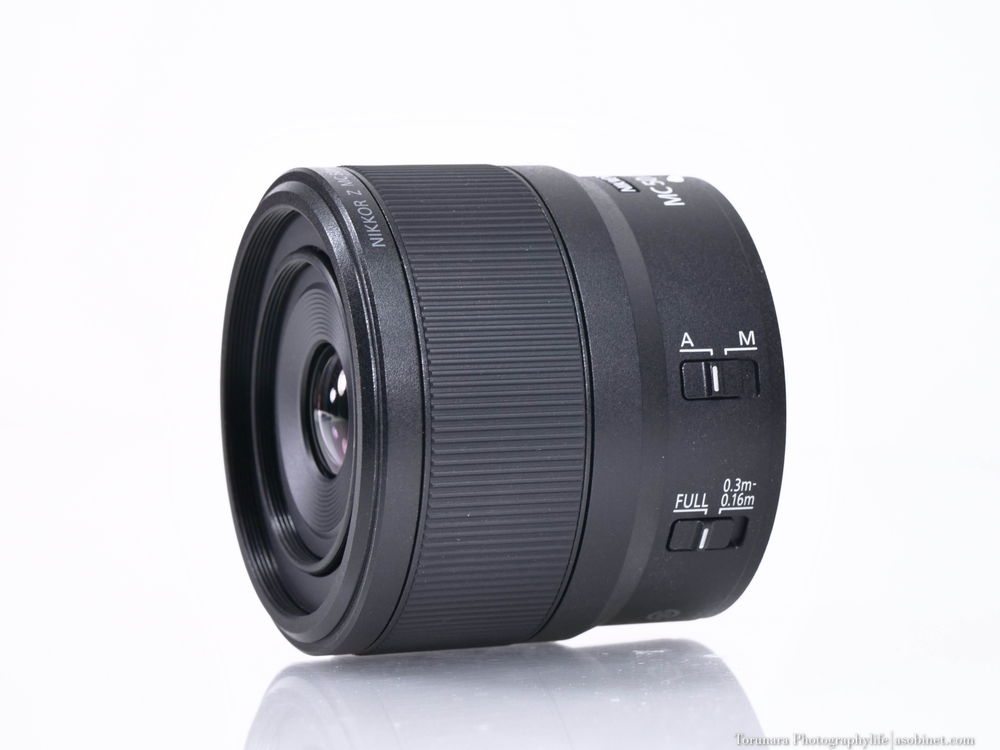
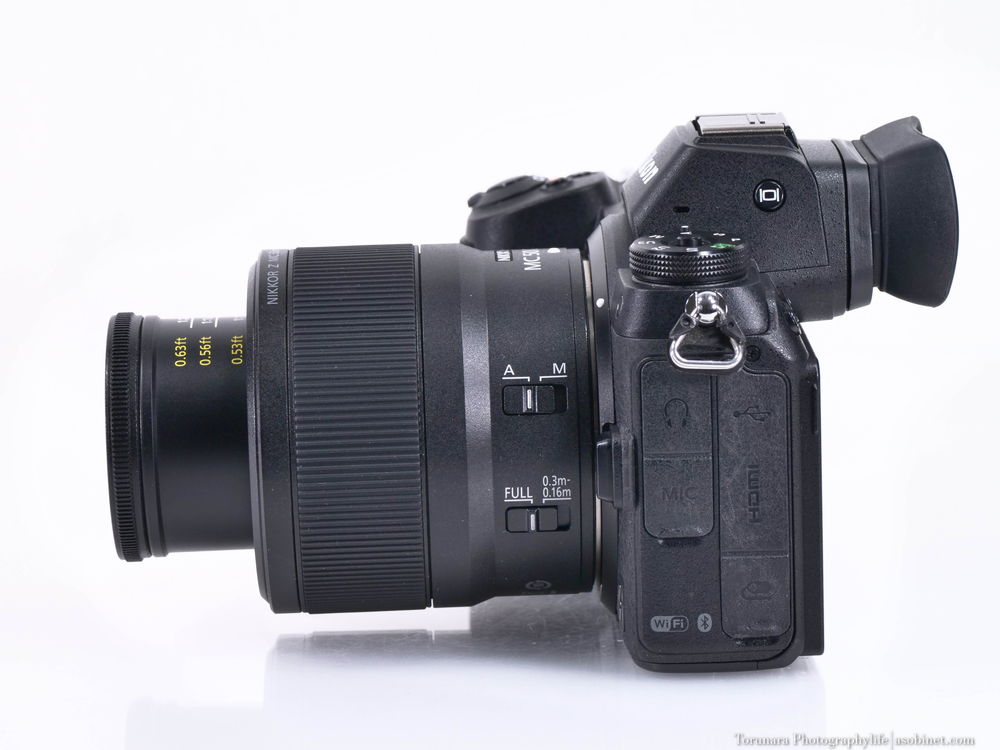
The control points are the focus ring, AF limiter and A/M switch. The exterior is entirely printed, with no etching. The focus range, CE mark and country of manufacture (China) are printed on the side.

As mentioned above, the inner barrel extends forward when focusing. It does not extend much when shooting distant scenery, but it extends by up to 2.5cm when shooting at 0.5x half-macro to 1.0x macro.
Hands-on
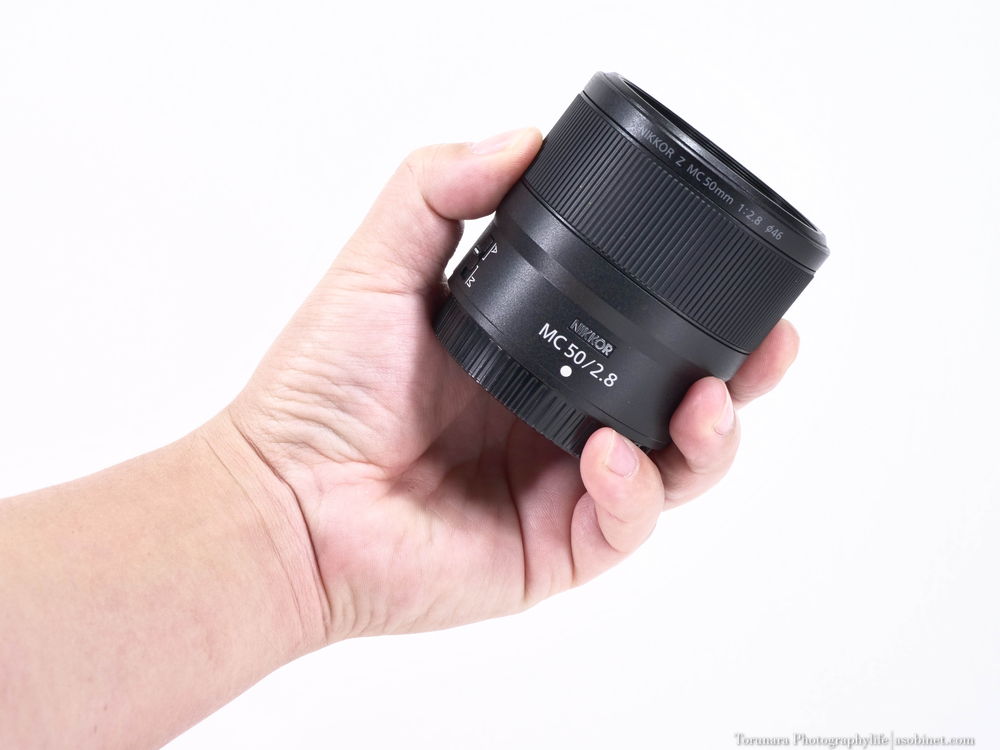
It's a little bigger than a palm-sized device, but it's very compact and lightweight for a micro-lens. The exterior feels a little plasticky, but I think it's within the range of compromise that makes it possible to achieve a lightweight design.
Front and back
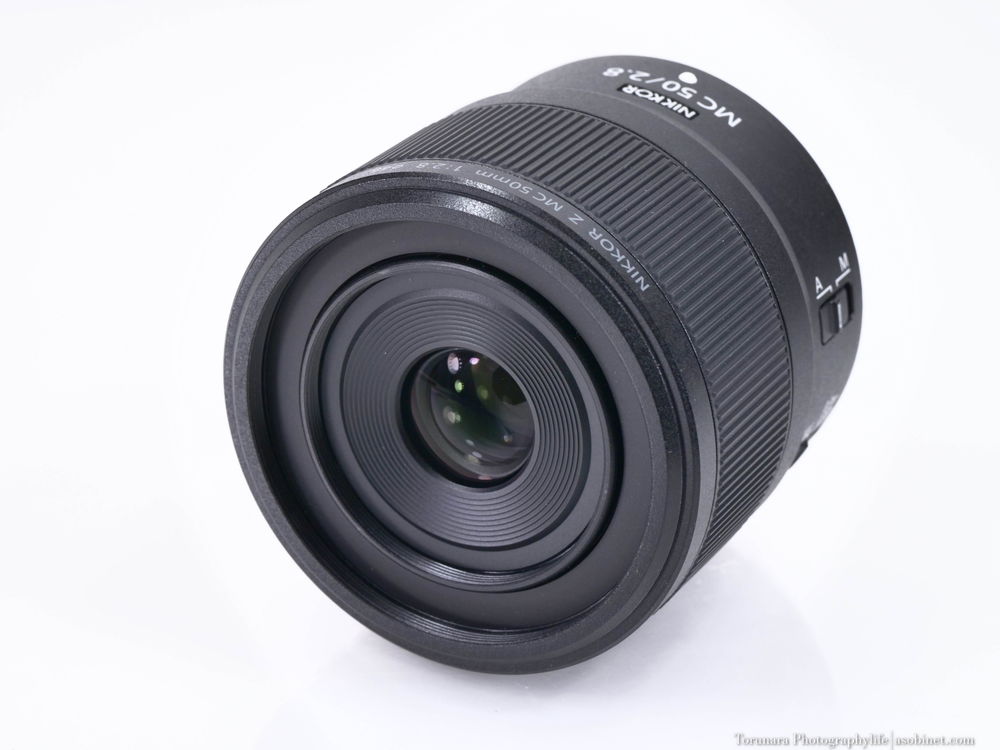
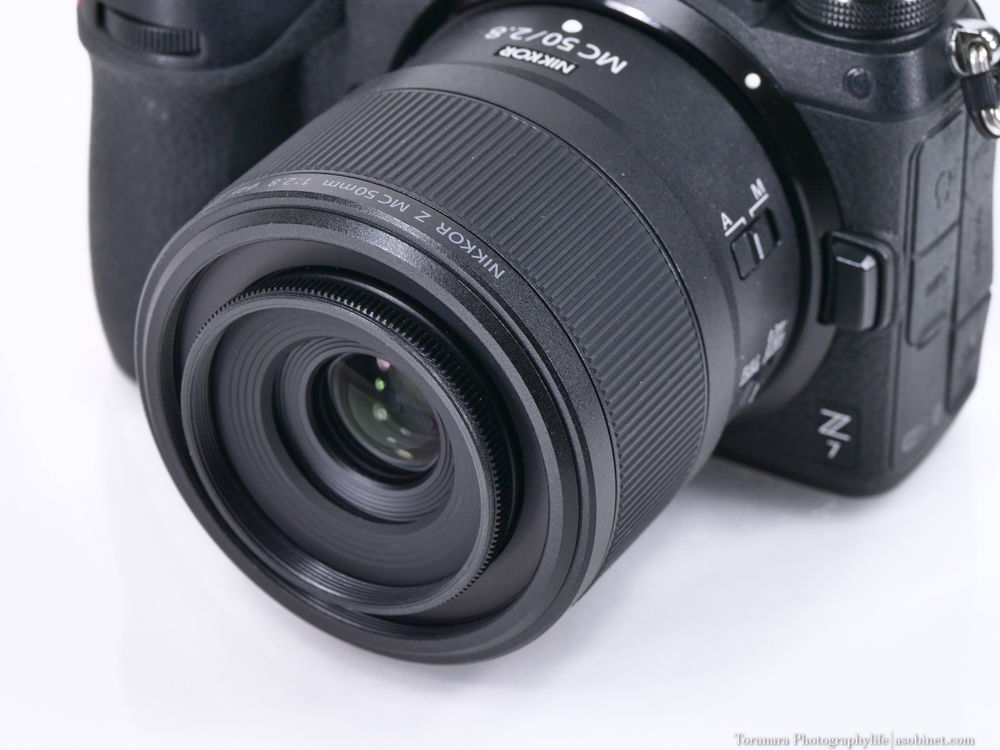
The small front lens has a 46mm filter socket. As there is no mention of a fluorine coating on the front lens, it is recommended to attach a protective filter if you expect water droplets or dirt to stick to it. In particular, when taking close-up macro shots with the standard lens, the working distance is short, so you need to be careful not to bump the front lens against the subject.
In addition to the 46mm filter, this lens also has a socket that can accommodate 62mm filters. However, it is not physically possible to attach 62mm filters or lens caps. This is a socket for the ‘Film Digitising Adapter ES-2’ only, but it is also possible to attach commercially available screw-on 62mm lens hoods. This is effective for adjusting the protruding front lens, and it is also a good idea to purchase one as an additional item.
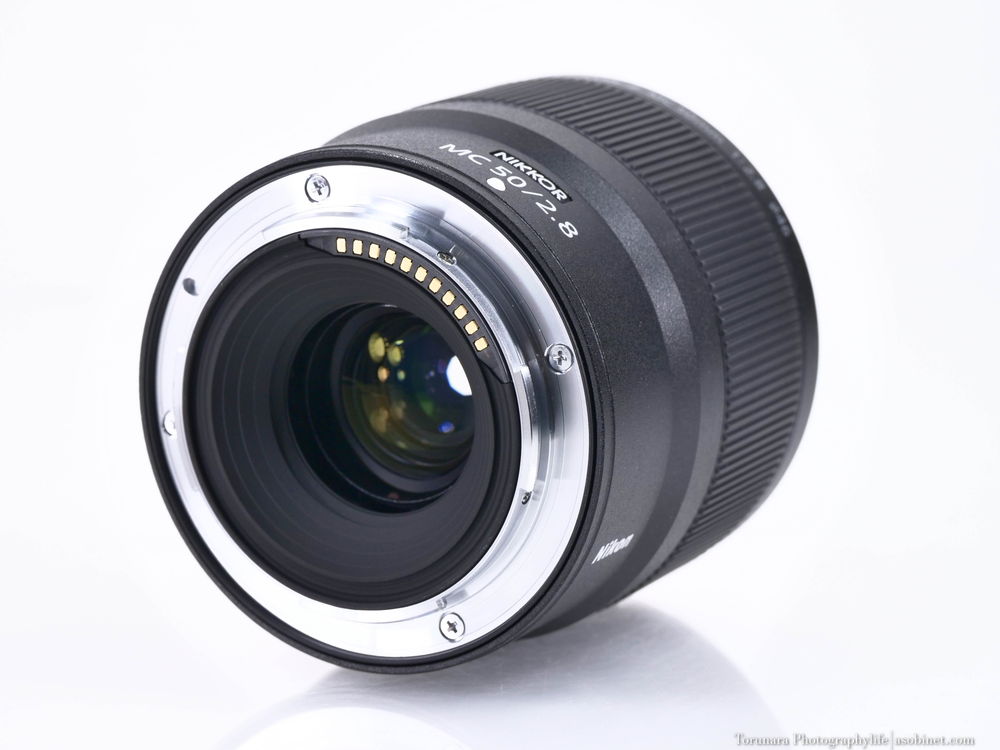
The area around the rear lens is treated to reduce unwanted light reflection, and a matte black coating is applied.
The metal lens mount is secured in place with four screws. The mount area is designed to be dustproof and drip-proof, and there are seals in various places on the lens barrel.
Focus ring
It has a wide rubber focus ring. It rotates smoothly, but it feels a little loose to me. The response is non-linear, so even if you rotate it quickly, you need to turn it more than once to move across the entire focus range. However, in general photography, you will only need to rotate it 180 degrees at most, and after that you will be using it in the macro range. As long as you don't have to manually control the focus from macro to long-distance shots, you shouldn't feel any stress.
Lens hood
A compact, thin lens hood is included. It is compatible with 46mm screw-in filters. Although it is a handy hood that does not detract from portability or storage, it does not have a function to protect the inner tube that extends, and it does not appear to be able to protect the inner tube from shock. If you are concerned about protection, it may be better to use the 62mm socket as mentioned above. However, please note that the 62mm hood is not compatible with upside-down mounting, and storage is significantly reduced.
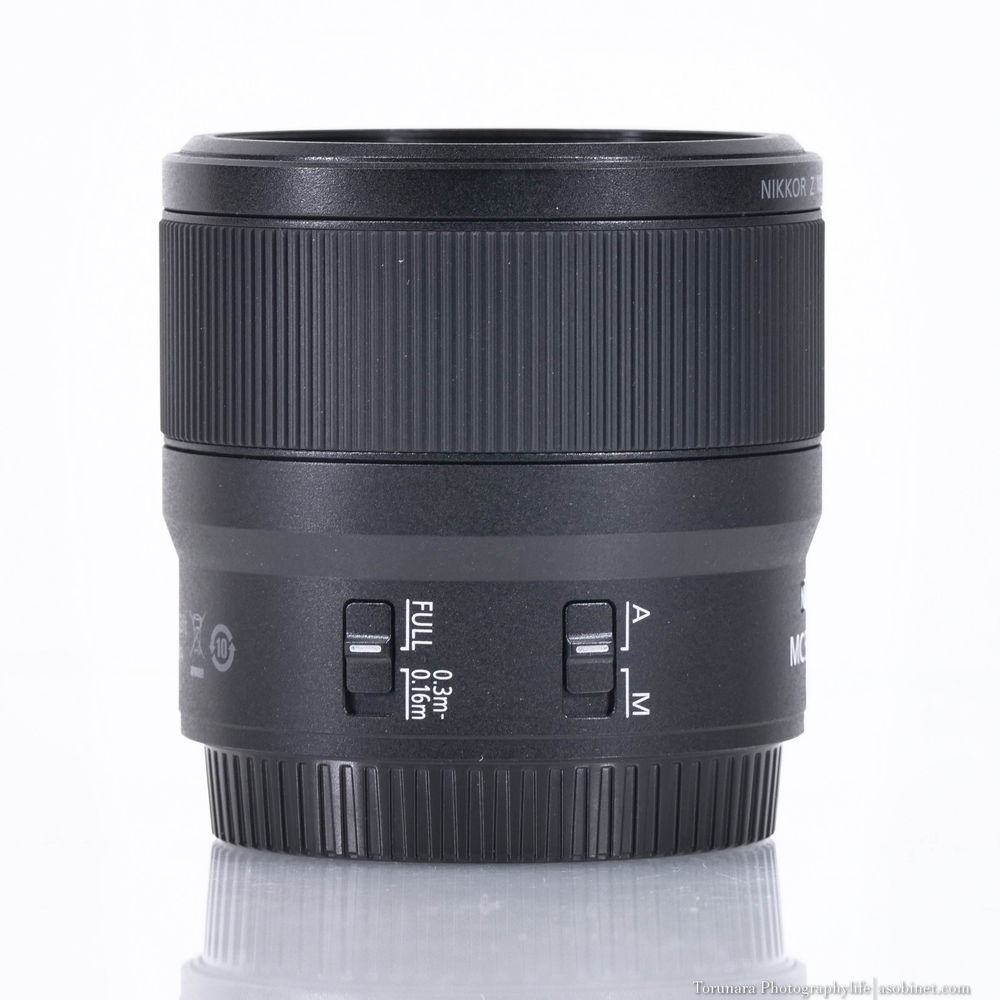
Switch
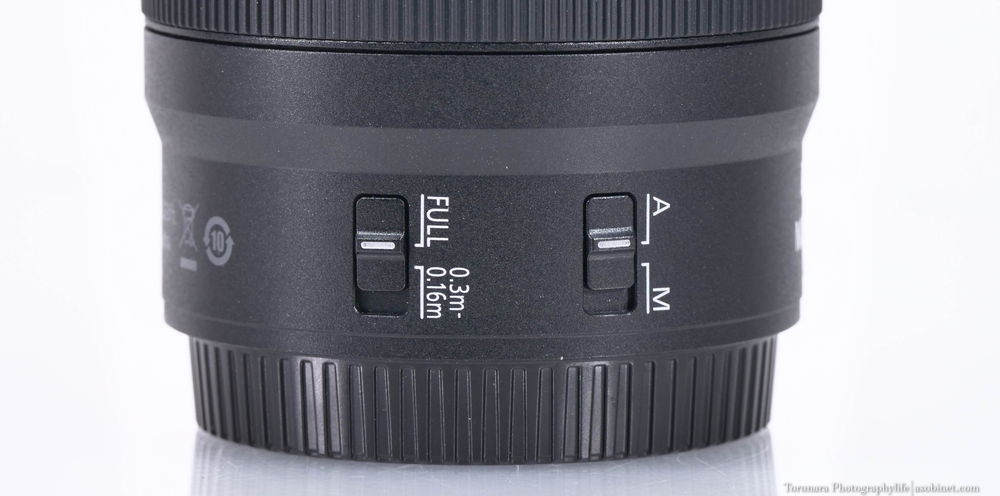
It is compatible with the A/M switch and focus limiter.
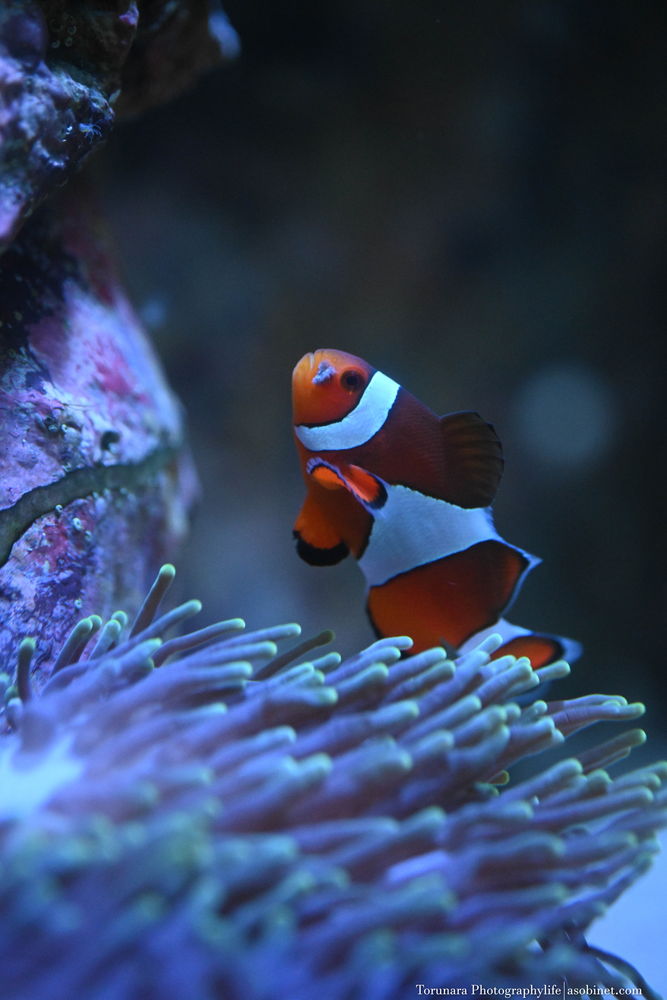
Example of use
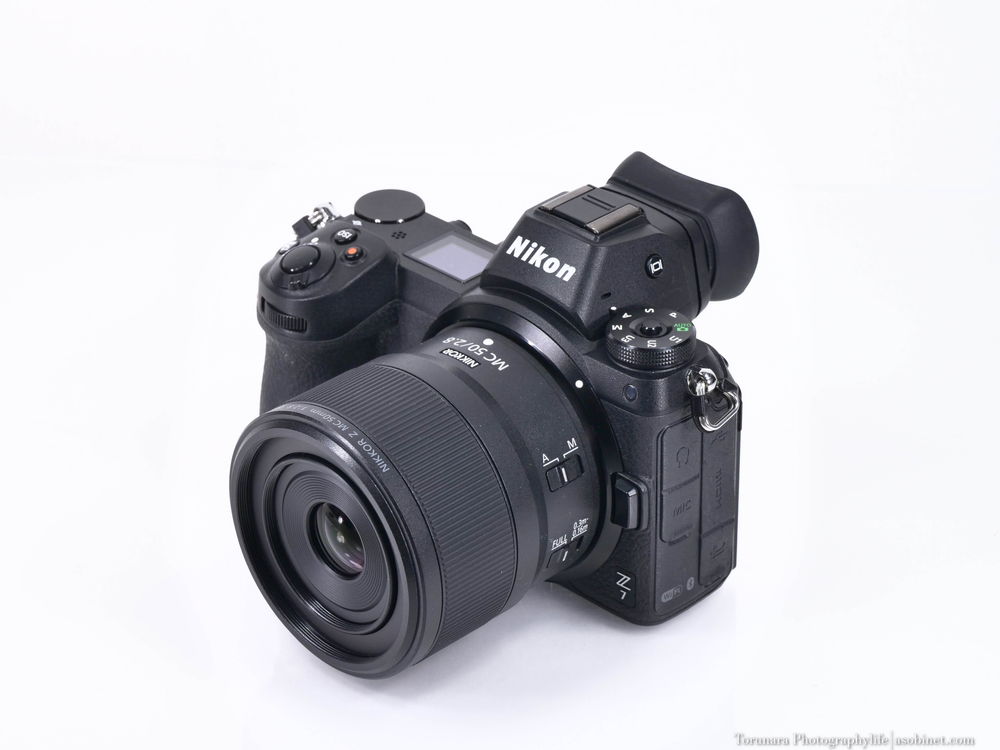
Fits on the Z 7.
It is a very compact micro lens that can be stored in small camera bags and sling bags. It is an attractive system that can be easily carried around as a walking camera. The placement of the focus ring and switches is good, and there are no complaints about the controls. It would also be interesting to use it with an APS-C body, but you should be aware that you won't be able to use the image stabilisation.
AF・MF
Focus Speed
The stepping motor is used to move the focus. The focus speed is far from lightning-fast, but it seems to work more quickly than you might expect. It is comfortable enough to feel ‘very fast’ for general shooting distances. In the macro range, the focusing speed does slow down, and it may be difficult to follow a moving subject with AF-C.
Breathing
Focus breathing refers to the change in the angle of view depending on the focus position.If the change in angle of view is significant, the field of view will expand or contract during focusing, potentially causing distractions and affecting autofocus stability. Ideally, it is better to have no focusing breathing. In order to check the effects of breathing, we took the following photos with the lens stopped down to the minimum aperture, at the minimum shooting distance and at infinity.

As you would expect from a macro lens, focus breathing occurs. Although the change in angle of view at typical shooting distances is not noticeable, there is a clear change in angle of view compared to other NIKKOR Z lenses.
AF accuracy
There were no major problems when used in combination with Z 7.
I think it would be difficult to use for intense tracking, but it should be fine for casual photography.
MF
As mentioned above, even when rotated quickly, a stroke of more than one rotation is secured. It is not suitable for quick operation, but it is sufficient for fine adjustment in macro photography. Although it has a non-linear response, I did not find it inconvenient when shooting macro.
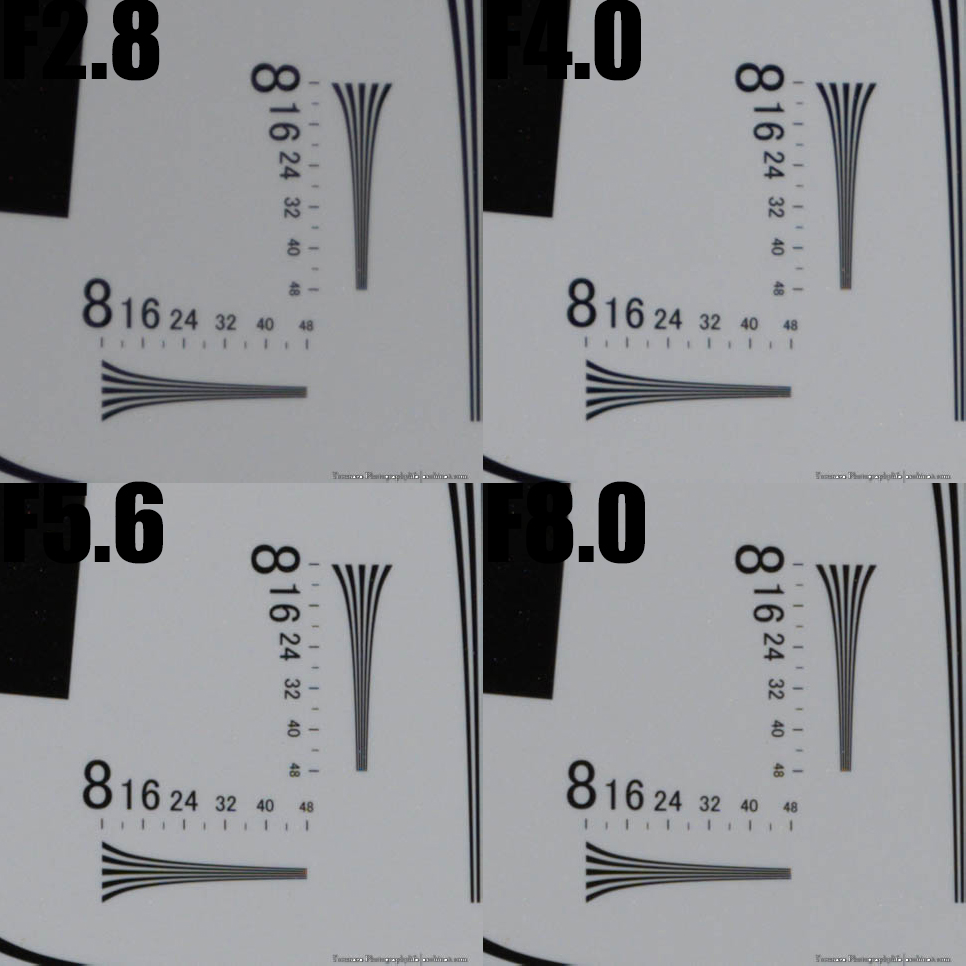
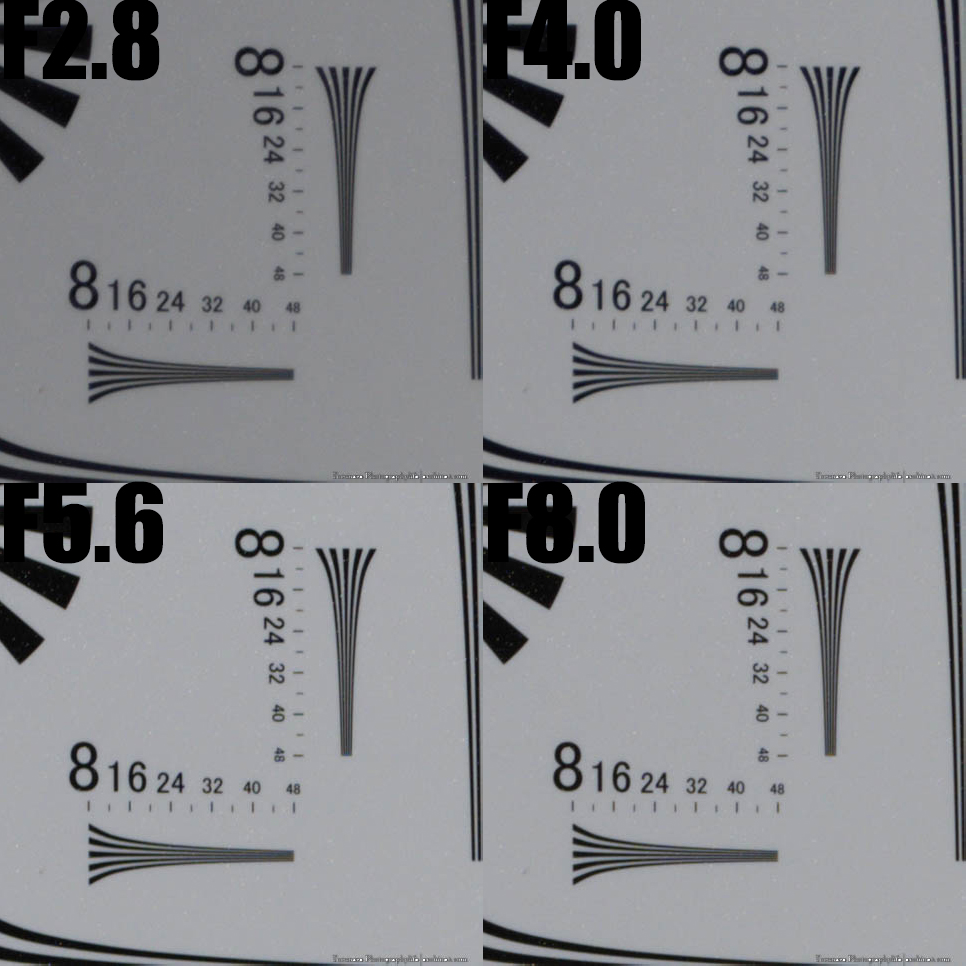
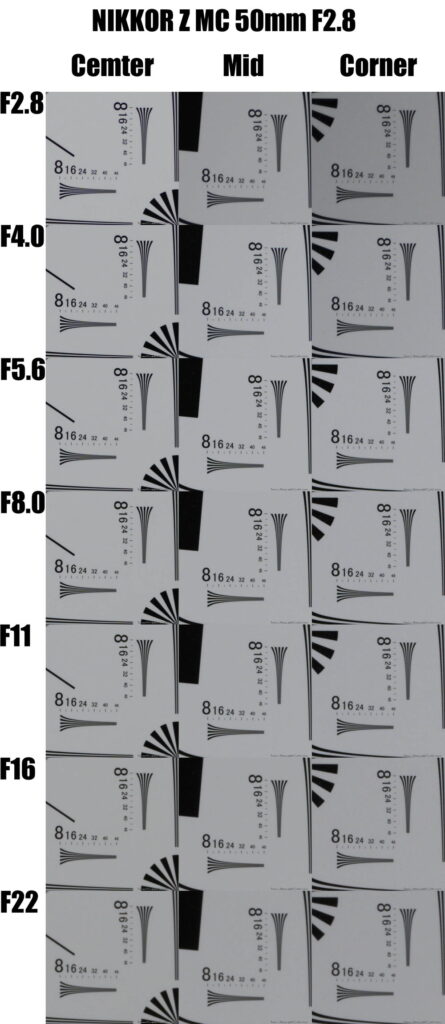
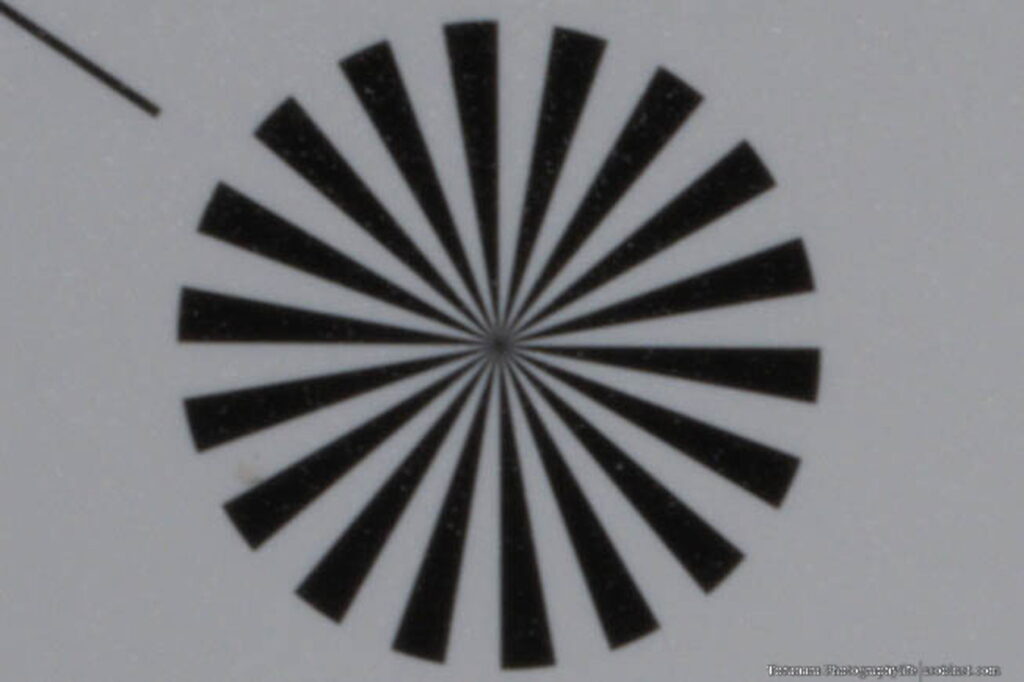
Resolution Chart
Test conditions
- Camera body:Nikon Z 7
- Interchangeable lens:NIKKOR Z MC 50mm f/2.8
- Pearl Optical Industry Co.
‘[HR23348] ISO12233-compliant 8K resolution test chart (for still cameras)’ - Olympus HYRes 3.1 analysis software
- The lighting environment is constant indoors.
- Tripod, self-timer 10 seconds, electronic shutter
- RAW output
- ISO 100
- RAW development in Adobe Lightroom Classic CC
・Sharpness: Off
・Noise reduction: Off
・Chromatic aberration correction: Off - Focus on each point to be analysed and take a picture
(image plane curvature is difficult to measure at close range, so check at infinity) - Note that this is a test at close range (infinity may be even better).
- If you adjust the sharpness when developing JPEG or RAW images, the values may improve. Please note that the values given here are the ‘minimum values’.
Test results
Although it doesn't have the outstanding resolution performance of the ‘NIKKOR Z MC 105mm f/2.8 VR S’, it is a high-resolution lens that is typical of macro lenses. The centre of the image maintains peak performance from the open aperture, and the periphery and corners also demonstrate good performance from f/2.8. When the aperture is closed, the performance is close to that of the centre, and a high level of uniformity is achieved across the entire frame. Even when the aperture is closed to f/11, the results are still very good, with a value of over 4000 across the entire frame.
Centre of frame
At least with the Z 7, which has a class of 40 million pixels, the performance is at its peak from the open aperture, and there is no visible improvement even when the aperture is closed. The contrast is also good, so it is a good idea to adjust the aperture by adjusting the depth of field and exposure.
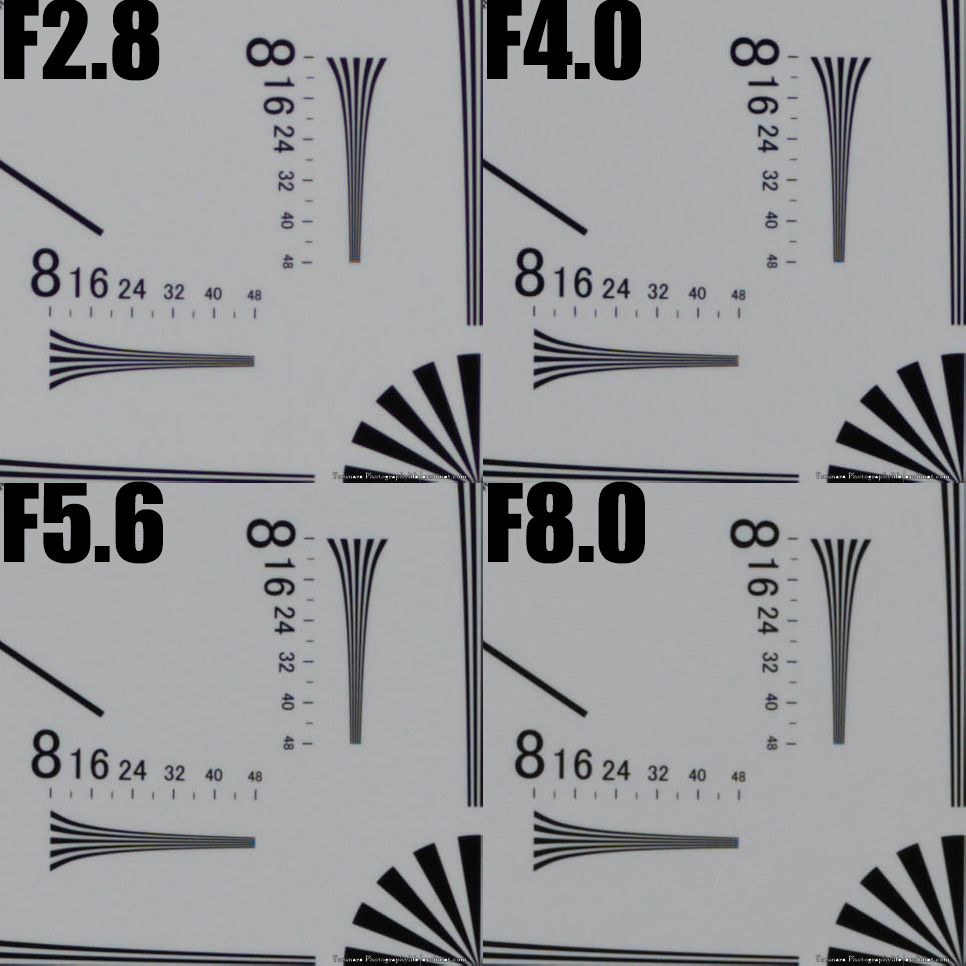
Middle of frame
Only at F2.8 is it slightly softer than the centre, but from F4 onwards it performs almost identically. The uniformity is so good that it is difficult to tell which is the centre.
Four corners of frame
Although the performance drops numerically, it maintains good performance as far as the actual image is concerned. When the aperture is narrowed down to F5.6 or F8, the performance improves to the extent that it is indistinguishable from the centre.
Sample
Comparison with Z MC 105mm f/2.8
The Z MC 50mm F2.8 also has a good performance, but the 105mm has an overwhelming homogeneity across the entire frame. It also has microcontrast like an apochromatic design, so I think it gives a punchy resolution that is more than the price difference. If you are doing serious macro photography, I recommend the 105mm.
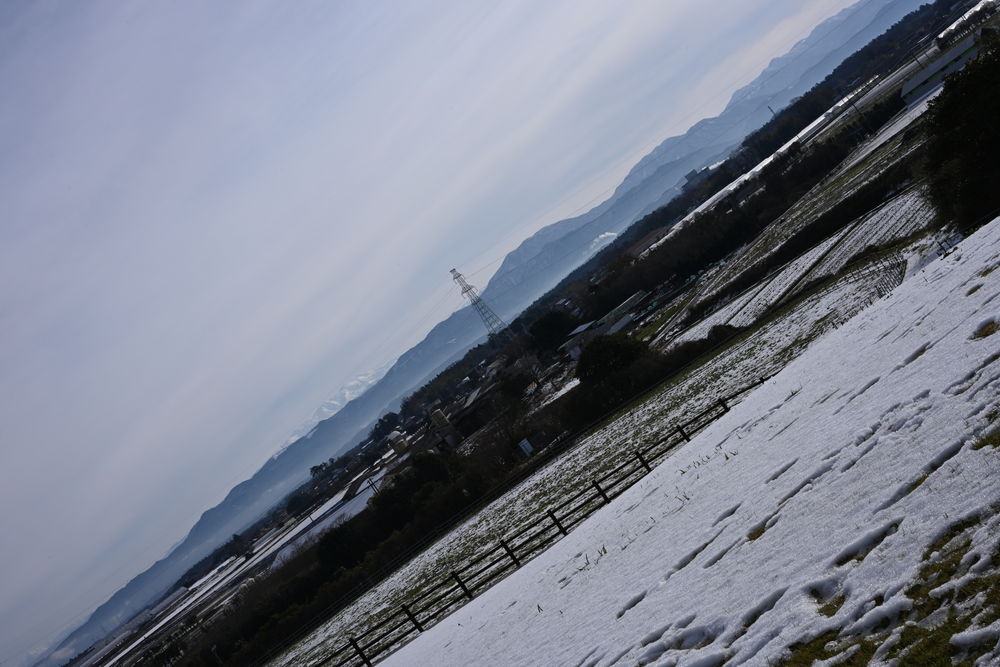
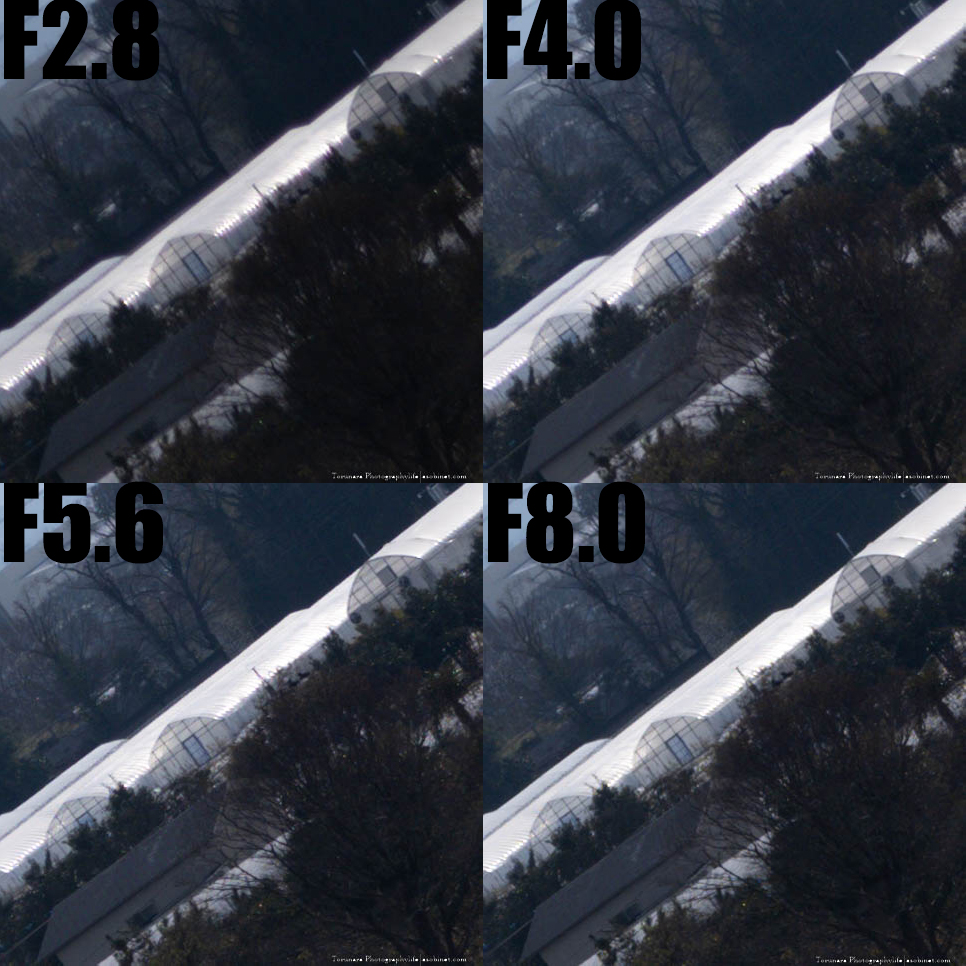
far-field resolution
Test environment
Date of shooting: 21 December 2022, Cloudy, Windless
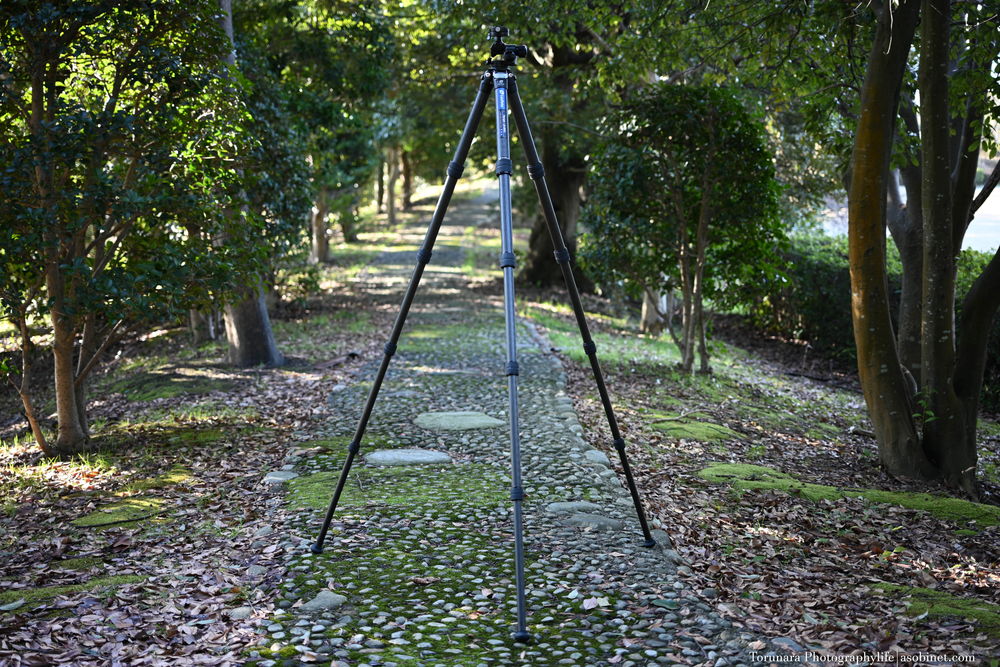
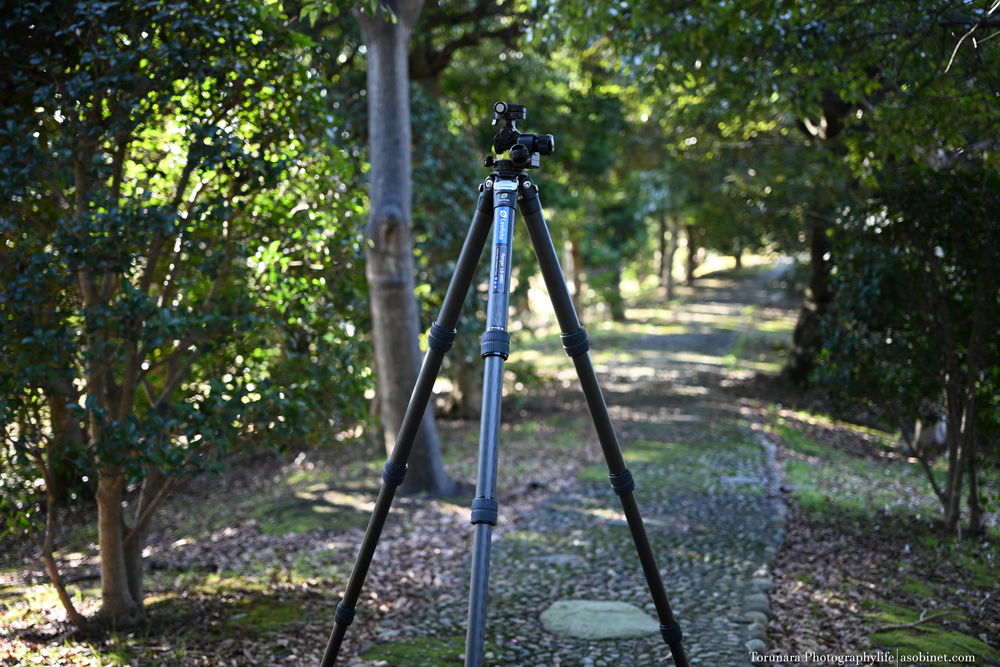
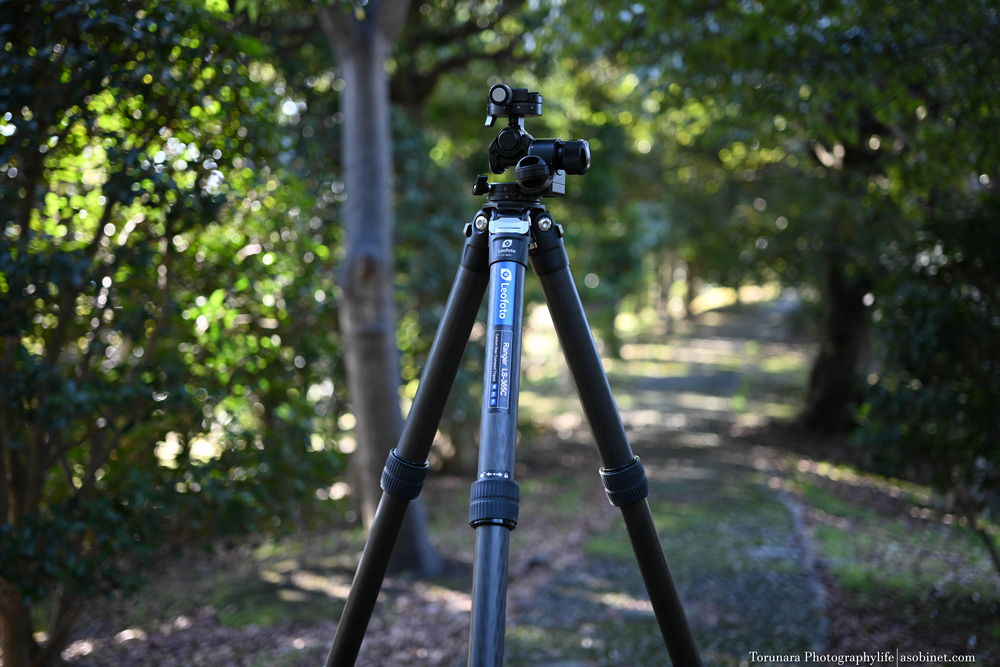
Camera: Nikon Z 7
Tripod: Leofoto LS-365C
Head: SUNWAYFOTO GH-PRO II
Exposure: Aperture priority AE ISO 100
RAW: Adobe Lightroom Classic CC
Sharpness: Off
Noise reduction: Off
Lens correction: Off
Test results
The lens demonstrates good resolution performance across the entire frame from wide open aperture. Although there is a slight decrease in contrast towards the corners, there is no significant decrease in resolution performance. Although there is no significant improvement due to the aperture, the peak is at F5.6-F8.
Centre of frame
The performance is already good enough from fully open, but there is a slight improvement when you stop down from f/5.6 to f/8. After that, the effects of diffraction become stronger, but it is still within acceptable limits up to around f/11. The performance drops significantly from f/16 to f/22, so it is best to avoid these settings if you don't need them.
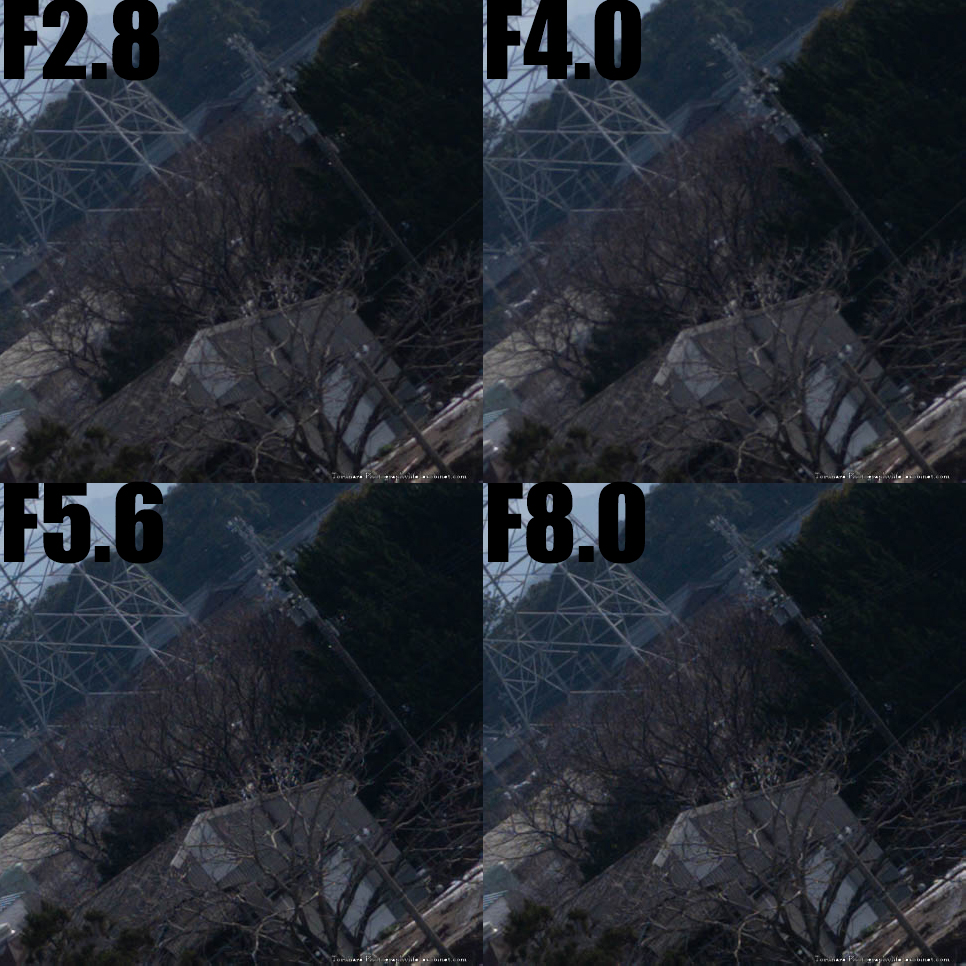
Middle of frame
It performs as well as the centre. However, there is a decrease in contrast, probably due to the remaining coma aberration. If you want to get clear results even in the peripheral areas, it is recommended to stop down to at least F4. Ideally, you should stop down to between F5.6 and F8.
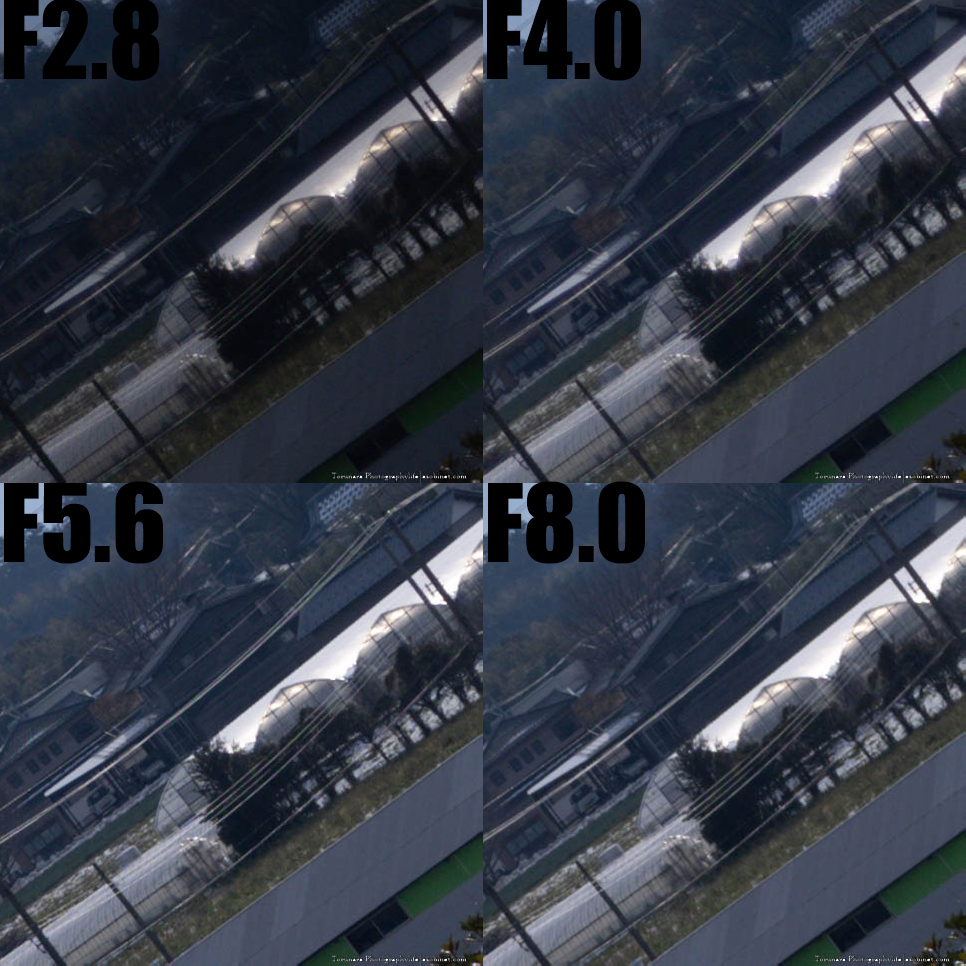
Four corners of frame
There is no significant drop in image quality even at the corners of the frame. It maintains good resolution performance. As with the periphery, there is a drop in contrast (not vignetting), so if you want to get the best results, you should stop down from f/5.6 to f/8. The results when stopped down are not bad when compared to the centre, and you could say that it is a performance characteristic of a macro lens with high homogeneity.
curvature of a surface
What is surface curvature?
This refers to the fact that the shooting distance at which the image is in focus differs from the centre to the four corners. For example, even if the image is in focus at a shooting distance of 1m, if the subject is moving back and forth around 1m at the edge of the frame, there is a possibility of field curvature.
Although there are few lenses that have noticeable field curvature, in recent lenses, aberration may increase and become noticeable at close distances. However, there are few opportunities to take photos of flat subjects at close range, so even if there is some image curvature, there is no need to worry.
However, if there is an effect even at infinity, you should be careful. If you are trying to achieve a pan-focus effect, for example in a landscape, there is a possibility that you will end up with an unintentional out-of-focus image. As there is no way to correct this aberration, the only way to avoid the problem is to increase the F-number to widen the depth of field.
Test results
I took the photos focusing on the centre and the corners respectively at F2.8. When you compare the results, there is no difference, and even if you use F2.8 when taking a photo of a distant scene, you can still get the entire frame in focus.

Lateral chromatic aberration
What is lateral chromatic aberration?
A colour shift that appears mainly around the edges and corners of the frame. Unlike longitudinal chromatic aberration, the effect of correcting this aberration using the aperture is small, so it is necessary to correct it at the stage of optical design. However, it is possible to digitally correct chromatic aberration using the image processing engine built into the camera body. This makes it possible to correct chromatic aberration, which is difficult to correct optically alone, and recently, there have been lenses that prioritise the correction of other aberrations over chromatic aberration correction. In particular, mirrorless systems tend to rely on post-processing.
Test results
The correction is very good, so there are no problems.

Longitudinal Chromatic Aberration
What is longitudinal chromatic aberration?
Longitudinal chromatic aberration is a colour shift that occurs in front of and behind the plane of focus. If the area in front of the plane of focus is mainly purple fringing, and the area behind the plane of focus has unnatural green colouring in the out-of-focus area, then the main cause is likely to be longitudinal chromatic aberration. This is more likely to occur with large-aperture lenses such as F1.4 and F1.8, and in such cases it is necessary to close down the aperture to improve the situation. It is possible to correct this using development software, but it is more difficult to process than lateral chromatic aberration, so it is best to suppress the aberration optically if possible. However, when suppressing longitudinal chromatic aberration with a large-aperture lens, the product price tends to be higher. Lenses that perfectly correct for longitudinal chromatic aberration have high contrast on the focal plane from wide open aperture, so you can expect a punchy resolution.
Test results
The correction is very good, just like the lateral chromatic aberration. Although it does not completely eliminate it, you will rarely encounter purple fringing with this lens.
Distortion
What is Image Distortion?
Distortion is the phenomenon where a straight line does not appear straight on a flat surface. It is particularly noticeable in cases where there are many straight lines, such as in man-made objects or when the horizon is visible, and it is divided into two types: barrel distortion, which is similar to the fisheye effect, and pincushion distortion, which causes the centre of the image to appear squeezed.
This is a relatively easy aberration to correct, but it is difficult to manually correct for distortions that have a special shape, such as ‘bamboo hat-shaped’ distortion. In this case, a correction profile that matches the lens is required.
Test results
The NIKKOR Z lenses have built-in correction profiles, and in Adobe Camera RAW and other software, the aberrations are forcibly corrected using soft correction. However, even in development software that does not support automatic correction, this lens corrects both near and far focus positions for distortion well. You can be sure that the lens is corrected well optically.
Coma aberration
What are coma and astigmatism?
Coma and astigmatism are mainly the failure of a point of light to appear as a point of light in the four corners of the frame. For example, this can be seen in artificial lights, stars and illuminations in night scenes. Even during the day, bright point light sources such as sunlight filtering through trees can also have an effect. As this problem cannot be corrected in post-processing, it is necessary to correct it optically.
Although it can be improved by narrowing the aperture, in situations where shutter speed is important, such as night scenes and astrophotography, it is not possible to narrow the aperture, and optical correction may be necessary.
Test results
If you check the full-size corner, you can see that the point light source is deformed. This is a noticeable result for a NIKKOR Z lens, and considering the price, I was expecting a slightly better result. It improves if you stop down by about two stops.

Spherical aberration
There is no significant change in the bokeh quality before and after. The spherical aberration is well corrected, and as can be seen from the test results for longitudinal chromatic aberration, there is no effect of focus shift. (The difference in luminance is due to the difference in effective F-value that occurred because the exposure was fixed when the photo was taken). There are signs of onion bokeh, which may be due to poor polishing of the aspherical lens, but I would like to point this out in the Bokeh chapter.
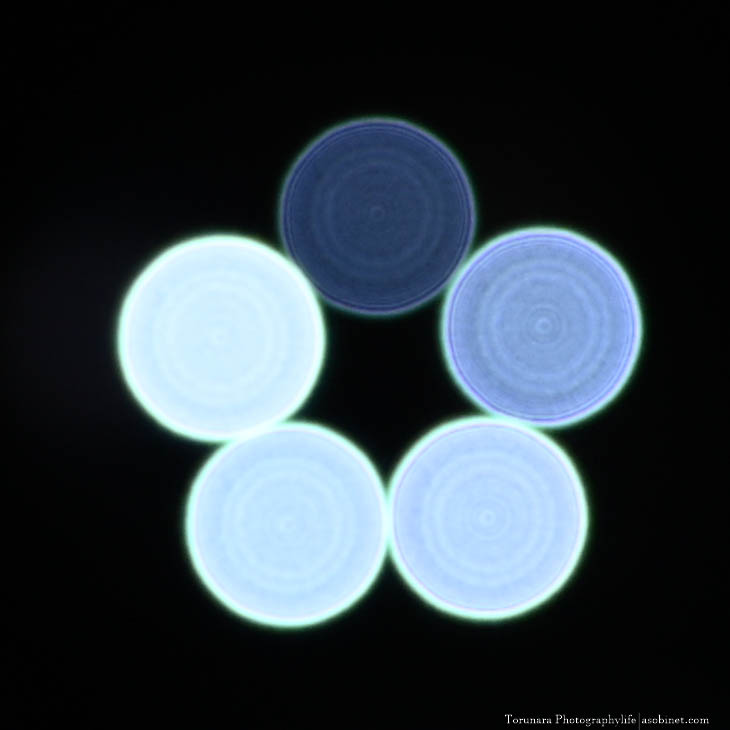
Foreground and background blur
What is a beautiful blur and a noisy blur?
The evaluation of bokeh tends to be subjective, but I personally think that ‘soft, diffused bokeh’ is beautiful, while ‘sudden bokeh or hard-edged bokeh’ is not so good (or is a unique depiction). However, everyone has their own preferences, so there may be people who prefer the opposite. For reference, here are some examples of ‘blurred bokeh’ and ‘hard-edged bokeh’. The difference in the tendency of the depiction is mainly due to the state of correction of spherical aberration, and when the bokeh on either side is soft, there is a tendency for the bokeh on the other side to become hard.
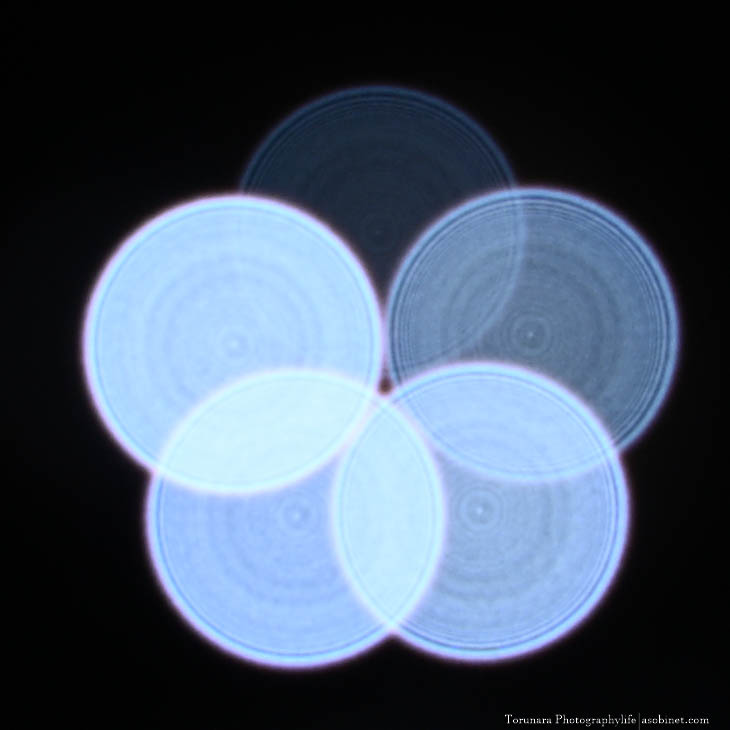
Back Blur
There is almost no difference in the quality of the bokeh before and after, showing a very neutral tendency. You can't expect a blurred bokeh, but you can get a smooth and easy-to-use bokeh with either.


Front Blur


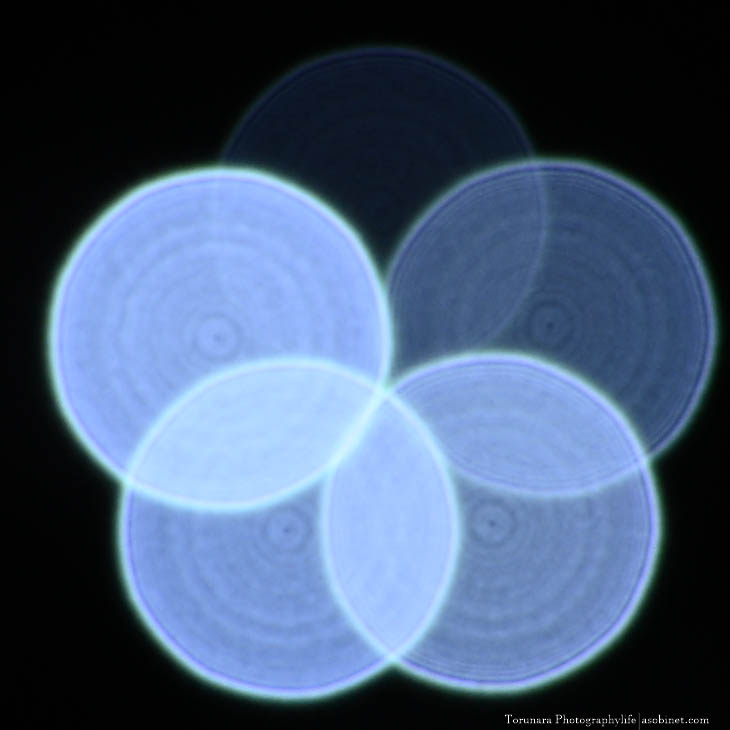
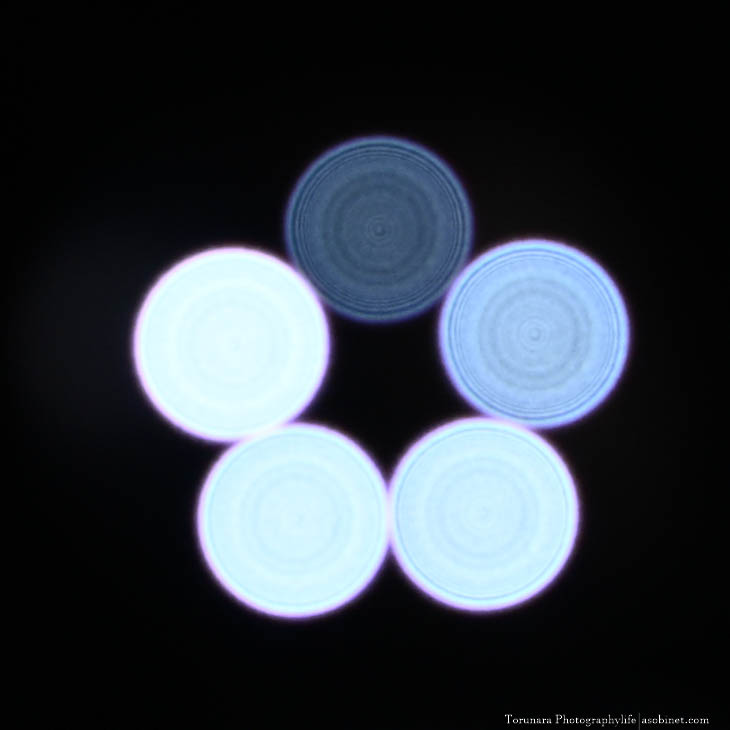
Bokehball
Effects of Vignetting and Spherical Aberration
If vignetting is strong, the bokeh at the four corners of the frame will be elliptically deformed or partially missing. The only way to solve this problem is to close down the aperture. However, closing down the aperture will make the bokeh smaller and in some cases the shape of the aperture blades may become visible, so it is necessary to compromise on the amount of vignetting depending on the situation.
If the amount of vignetting is small, it is possible to get a circular bokeh from wide open to the four corners. Ideally, a lens with little vignetting is preferable, but to eliminate it, it is necessary to fundamentally increase the size of the lens. There is a need to strike a balance between portability and cost, so some kind of compromise is necessary.
If the correction of spherical aberration is not perfect, there will be a difference in the depiction of the bokeh in front and behind (as shown in the review of bokeh in front and behind). In this case, one side will have a smooth depiction with blurring, while the other side will have a hard depiction like double-line bokeh.
Test results
The centre is circular, but towards the corners it appears to be affected by vignetting. The corners are not rounded off, so it does not look good. In addition, the bokehball has a slightly strong border, and there is an inner ring (called an onion bokeh) inside that appears to be an irregularity in the aspherical lens. It is not extremely bad, but it cannot be said to be the best bokeh for a single-focus lens.

Sample of a boke
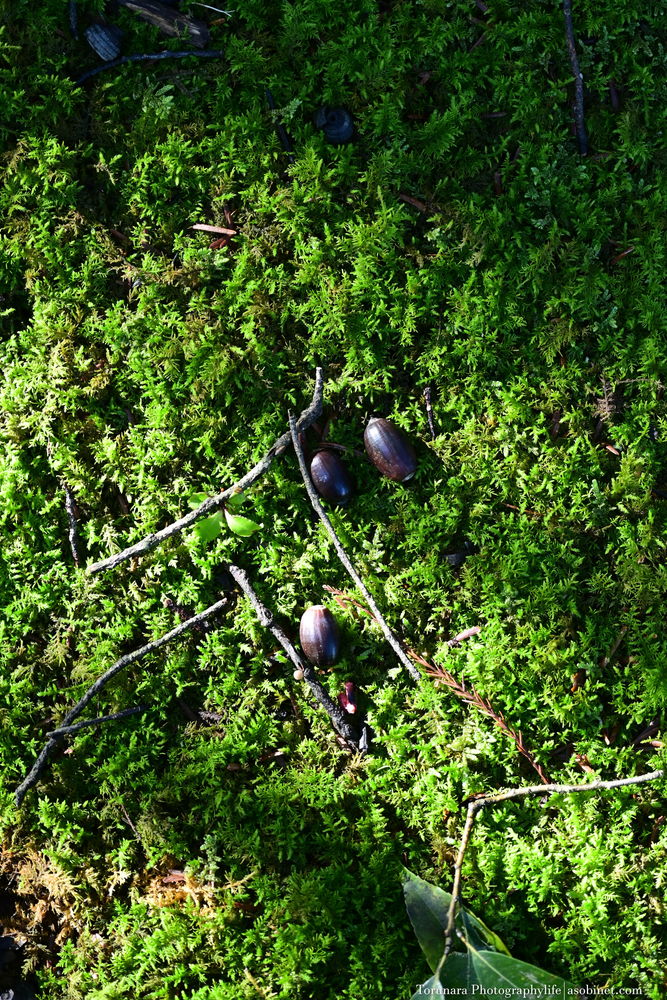
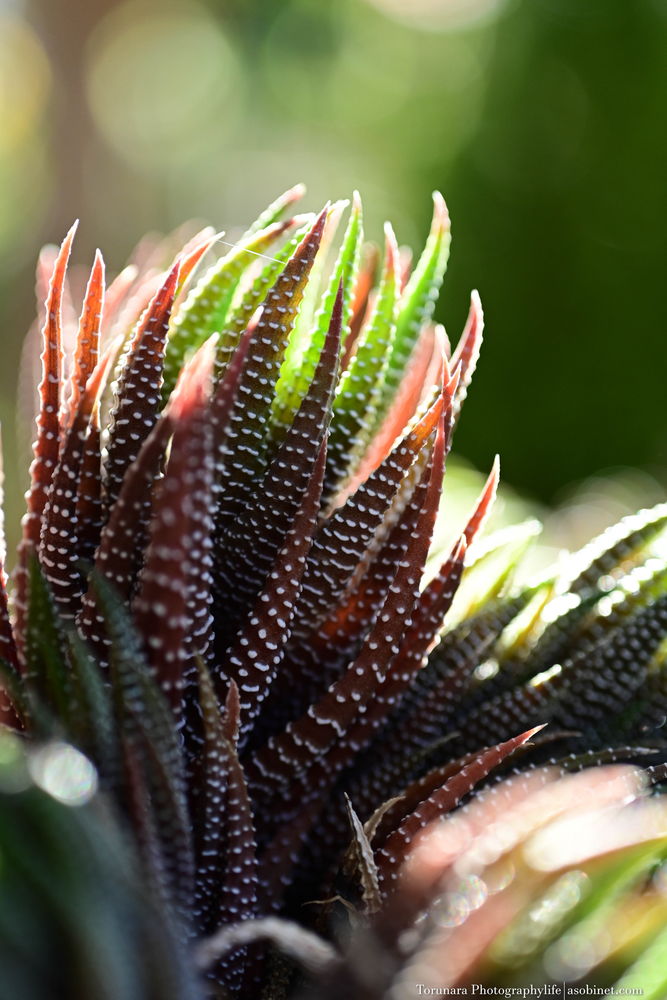
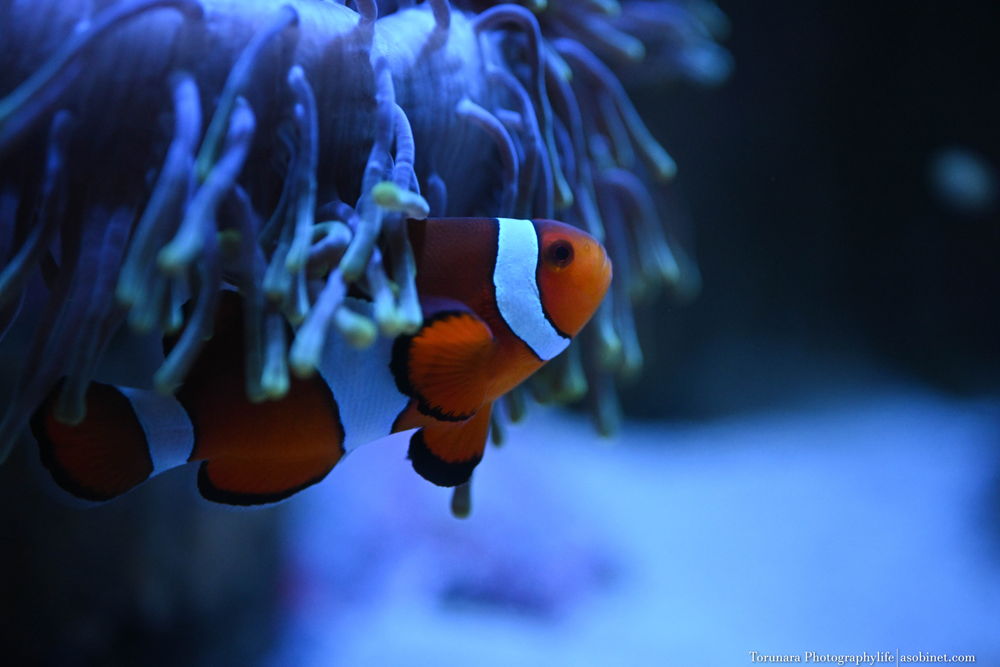
Close range
When shooting close-ups, spherical aberration is not noticeable, and you can get a high-contrast in-focus plane and smooth out-of-focus background. If you look closely at the bokehball, you can see a slight outline, but in real-life photography, this is not something that will be noticeable in many scenes. If anything, the effect of vignetting is stronger towards the corners, so depending on the situation, it may be better to stop down a little. If you stop down by 1-2 stops, you can get a natural bokeh.

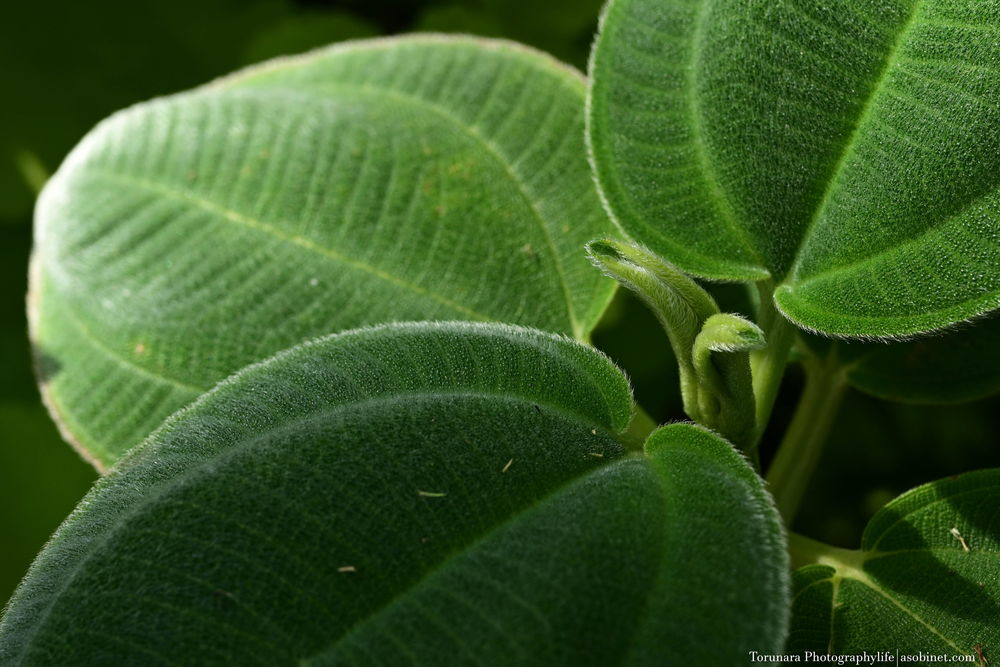
Short range
Although the outline of the bokehball is more pronounced than when shooting close-ups, the overall result is pleasing to the eye. There is little chromatic aberration, and from f/2.8 the contrast is high and the image has a punchy feel. If you are concerned about vignetting, you will need to adjust the aperture, but you will need to balance this with the size of the bokeh.

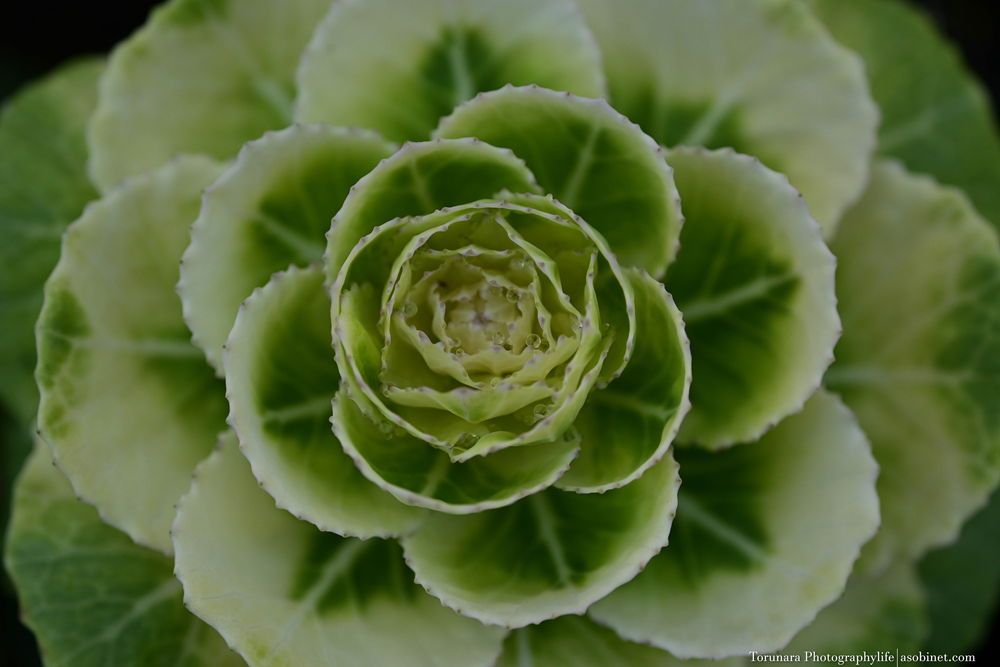
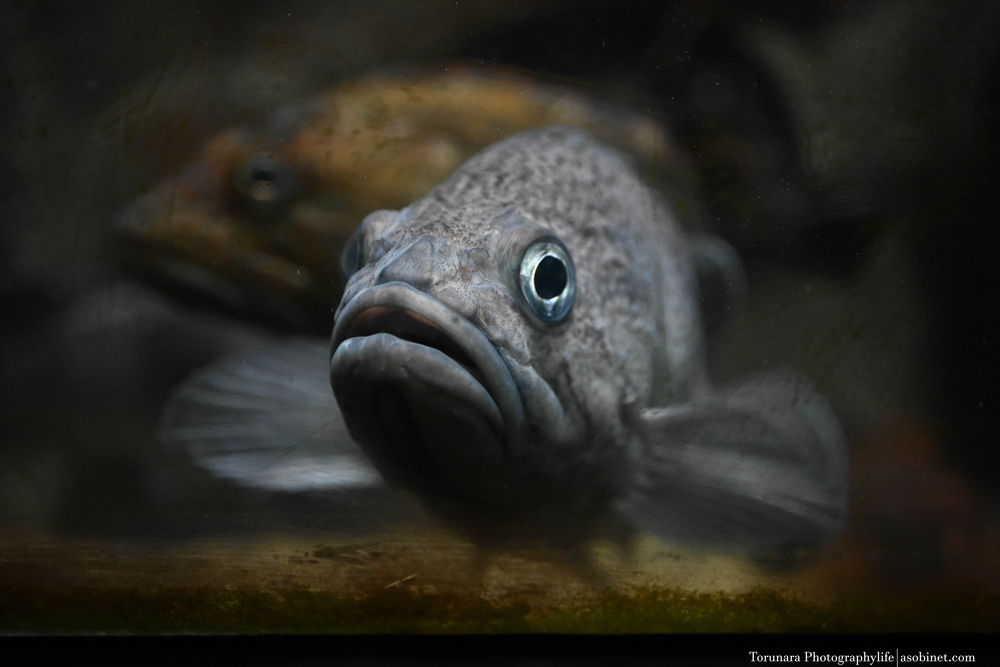
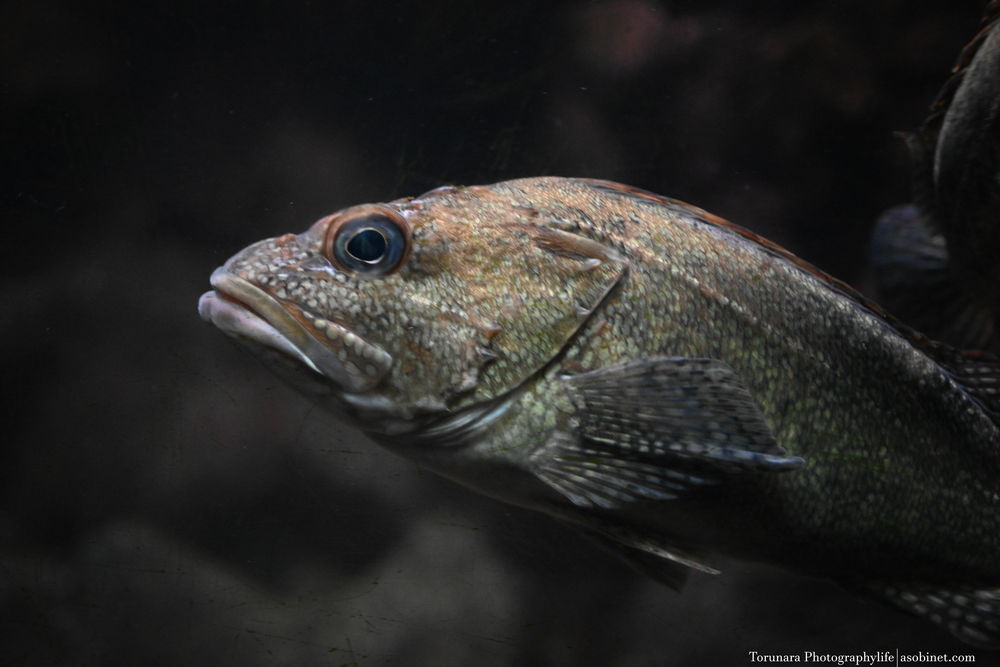
Medium range
It's not the best bokeh, but it has minimal spherical and chromatic aberration, so it maintains a fairly good-looking bokeh. However, the effect of vignetting is stronger, and depending on the situation, it may look like it's swirling. If you're concerned about this, a 1.5-stop aperture is just about right.
Furthermore, as the shooting distance increases, the bokeh around the edges of the frame appears to become more noisy. It is not extremely noticeable, but it is not a particularly strong point of the camera.

Portrait
The following are the results of taking pictures of a tripod that is 170cm tall while changing the distance and aperture.
It's a bit of a struggle to get the whole body in the frame and separate it from the background, but by getting close enough to the upper body, you can get a good enough size of blur. To get a satisfying level of texture, you might want to get even closer, up to the bust.

Vignetting
What is vignetting?
Unnatural drop in light intensity around the frame.
The light intensity is lower than in the central area, and there is insufficient exposure in the four corners of the frame. This mainly occurs with large-aperture lenses and wide-angle lenses.
Although this is a phenomenon that can be easily corrected using software, it is necessary to be careful about the fact that it can cause noise, as the insufficient exposure is covered by post-processing correction (sensitization). In particular, when using high sensitivity for nightscape or starry sky photography, there is a possibility that noise will appear strongly.
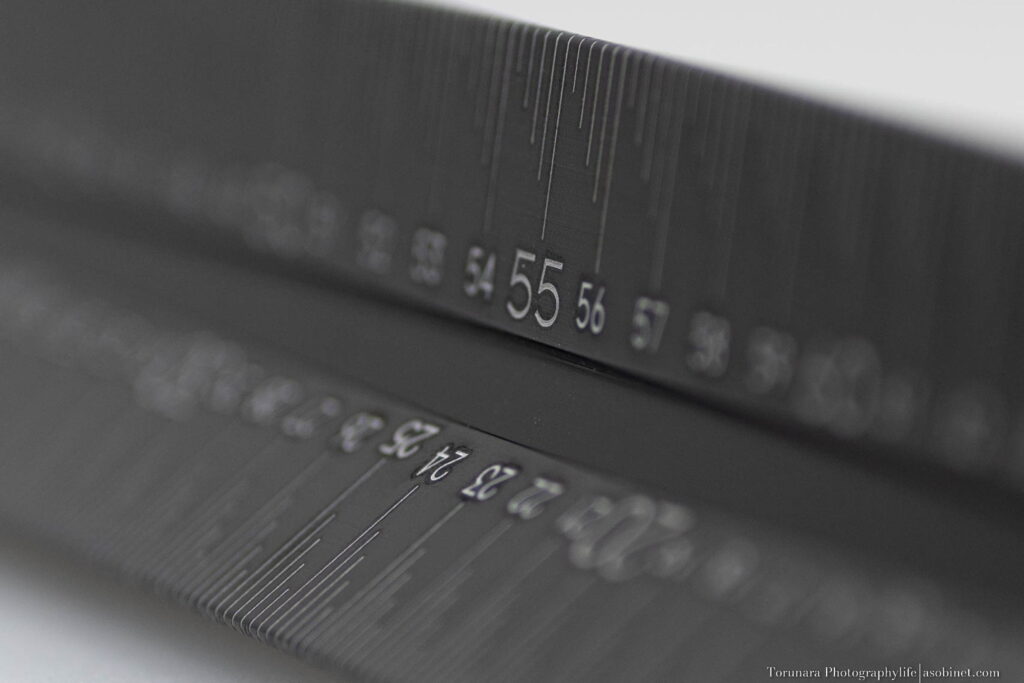
Minimum focusing distance
There is almost no effect of vignetting from the maximum aperture. The amount of light is reduced by about two stops compared to infinity, but you can take photos with a flat amount of light from the centre to the corners.
(Note: For convenience, the aperture values displayed in the sample photos are ‘F2.8~F22’, but Nikon cameras record the effective F-number, ‘F5.6~F32’)

Infinity
In contrast to the minimum focusing distance, the vignetting at the maximum aperture is noticeable. It improves significantly when stopped down one stop, and is almost eliminated when stopped down two stops.

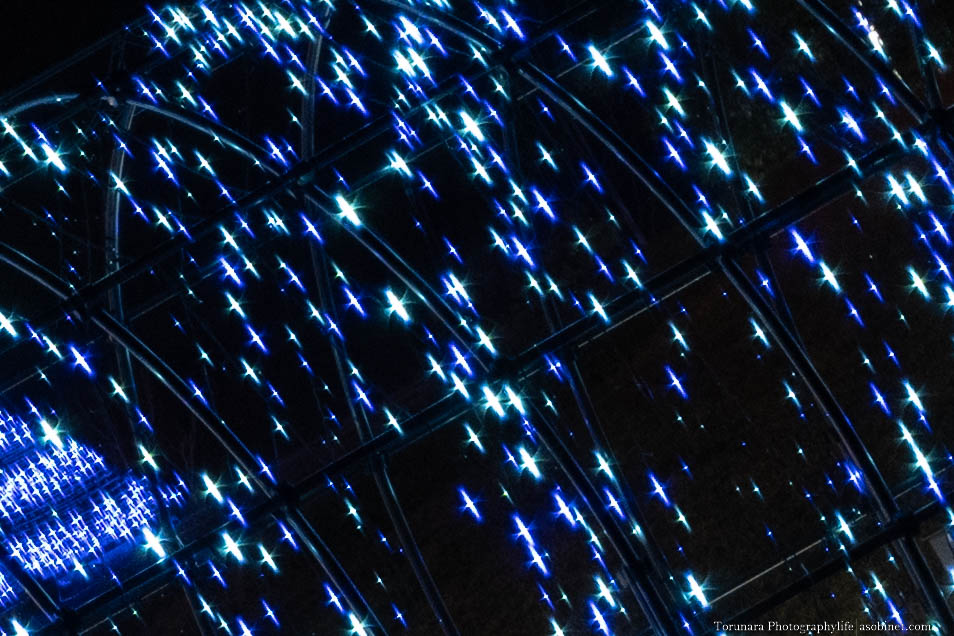
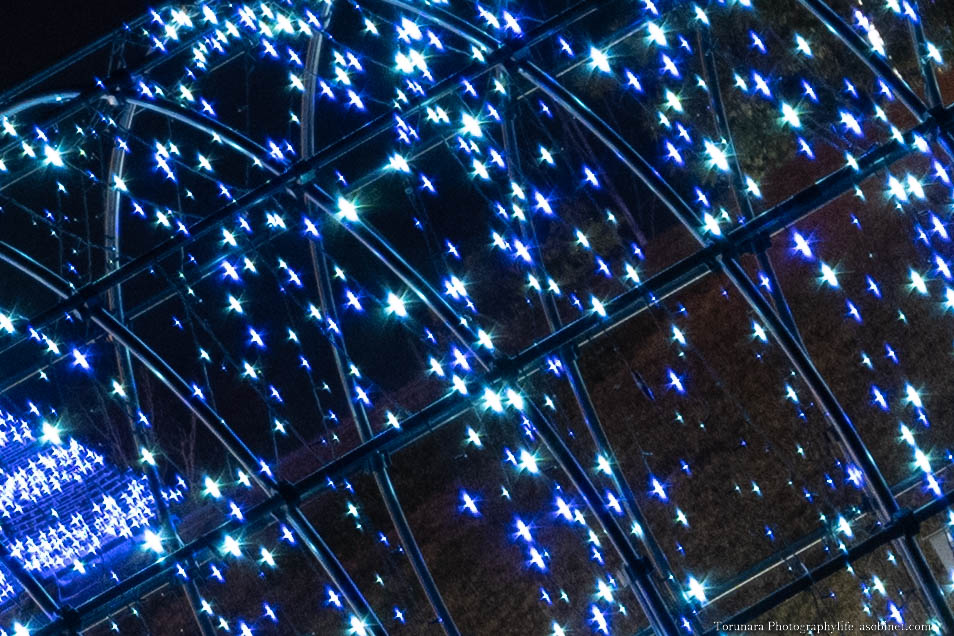
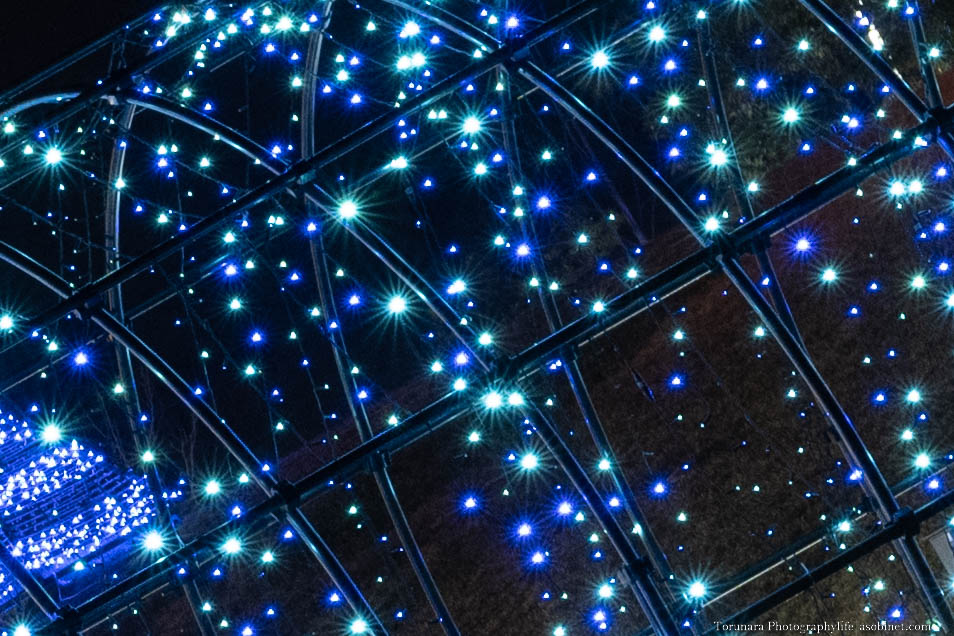
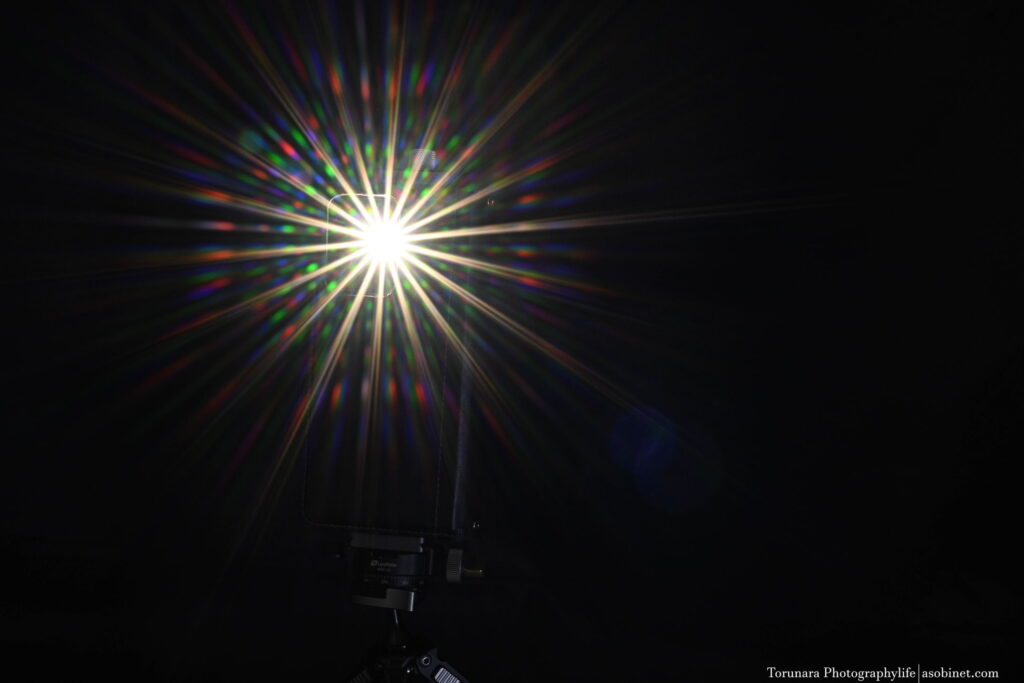
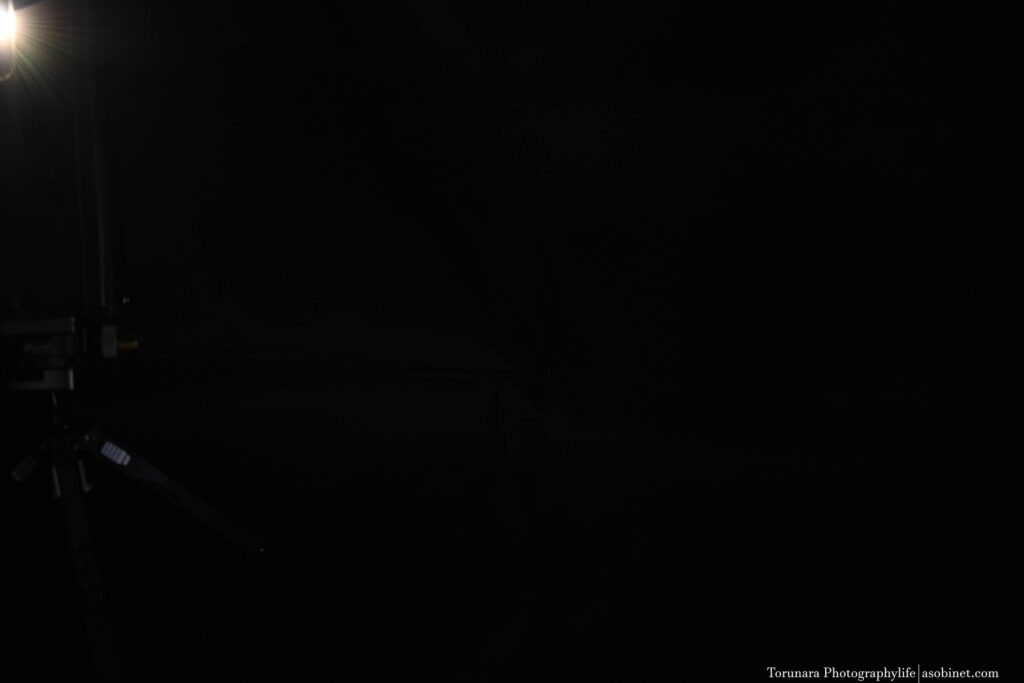
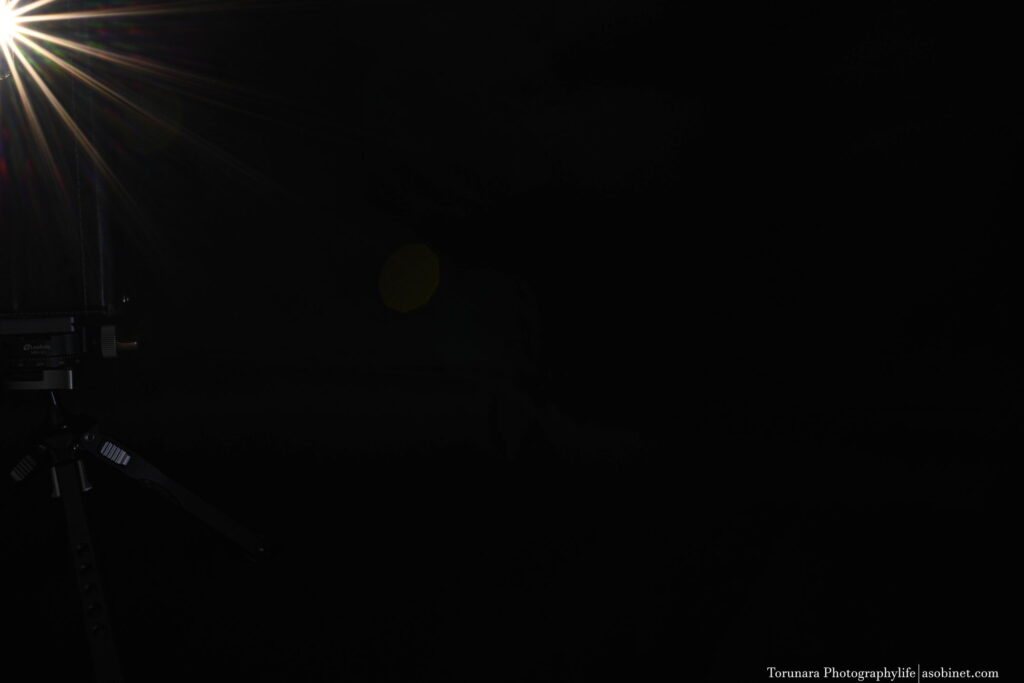
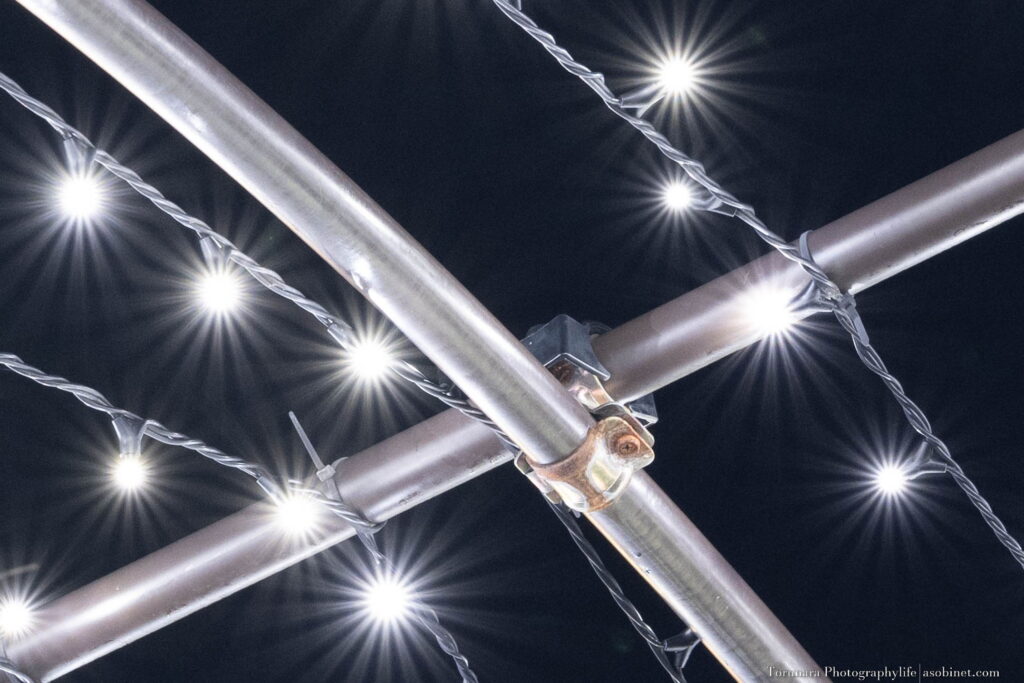
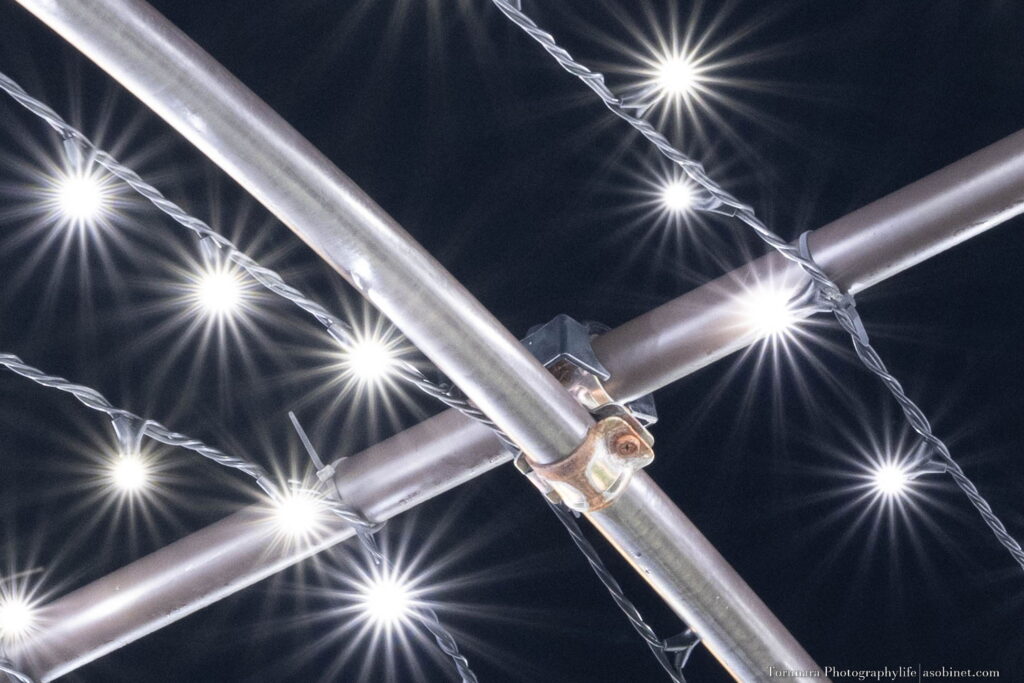
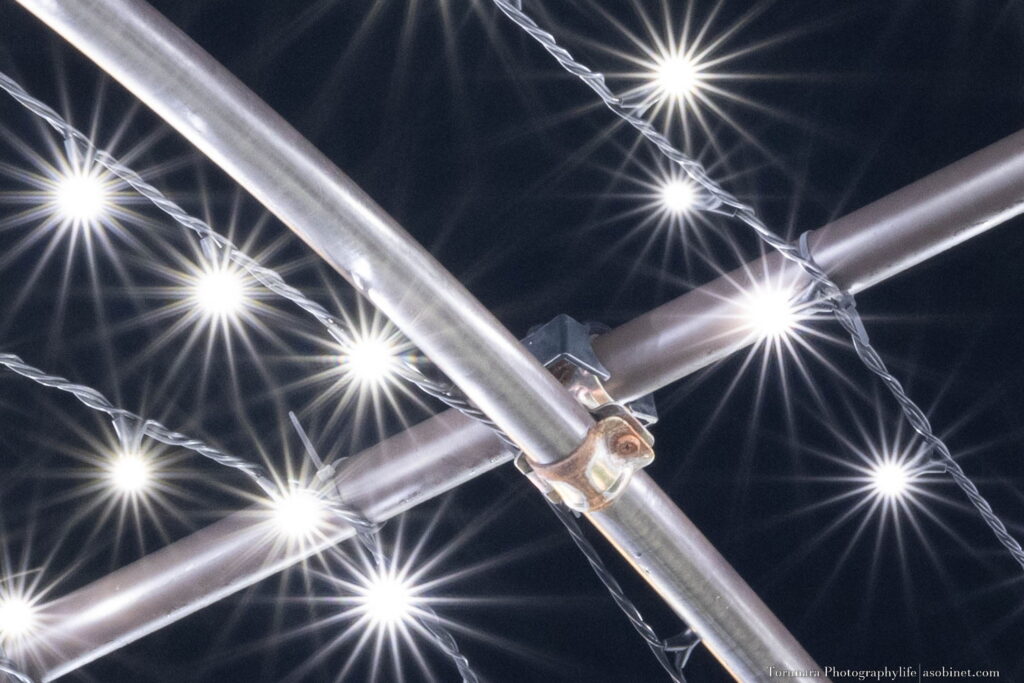
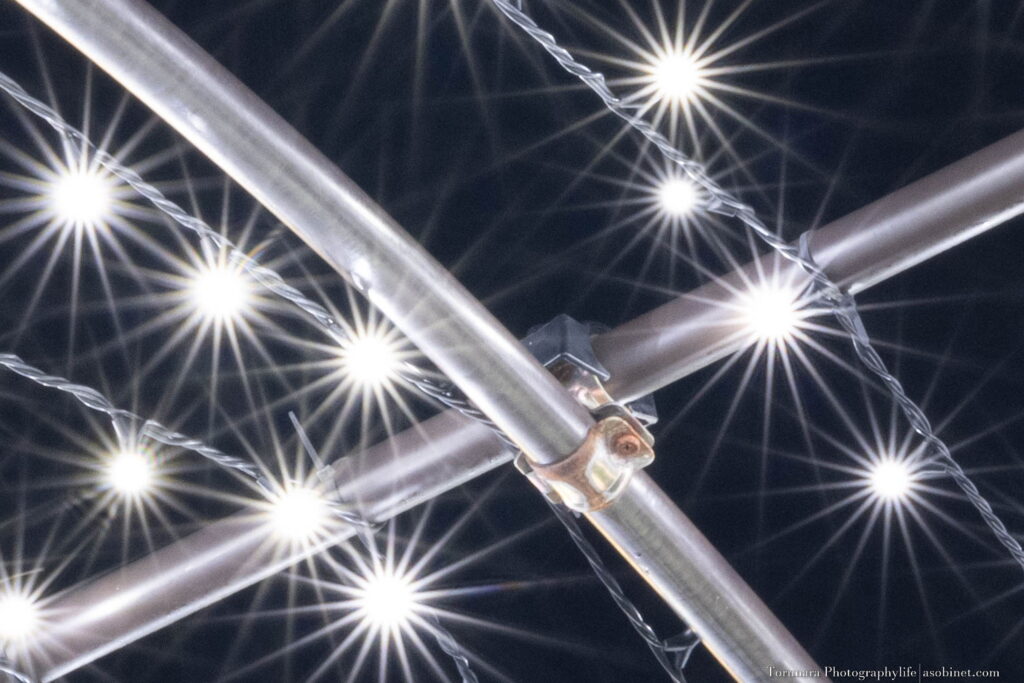
Backlight resistance, sunstar
centre
There is no significant effect other than the occurrence of RGB ghosts that are thought to be reflections on the sensor surface. Even when the aperture is narrowed, flare and ghosts are well suppressed. Backlight resistance can be said to be good.
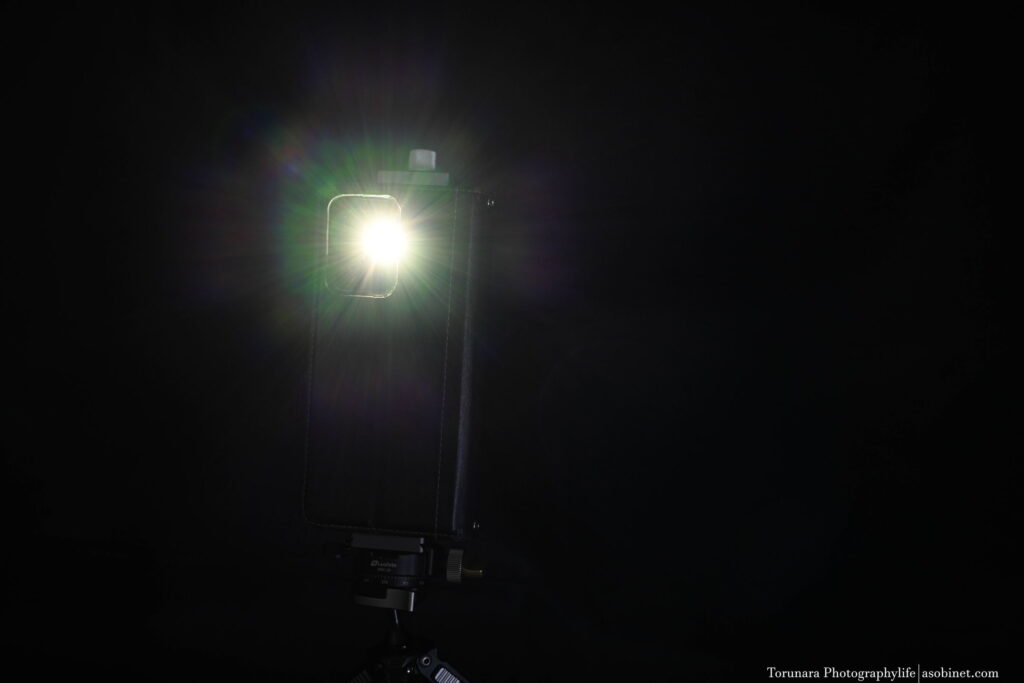
corner
Even if you move the light source to the corner, the effects of flare and ghosting are not noticeable.
sunstar
Sunstars start to appear from around F4, but the type of depiction that disperses and does not taper off continues until around F11. If you want to get a beautiful sunstar, you need to use F16~F22.
Summary
Good points
Compact and lightweight
Designed to be dustproof and drip-proof
62mm filter socket (fixed to the lens barrel)
AF that works well at typical shooting distances
Excellent resolution performance overall
Good chromatic aberration correction
Smooth bokeh when shooting close-ups
Distortion correction status
Backlight resistance
Sunstar
Although it is not quite as good as the S-Line's 105mm F2.8, it is a lens that demonstrates the high resolution performance that you would expect from a micro lens. Chromatic and spherical aberrations are well corrected, and it is possible to obtain a high-contrast in-focus plane from F2.8. Although the bokeh is not a smeary depiction, it is possible to obtain a bokeh that is easy to use without standing out badly in many situations. It is a good lens with almost no weak points in terms of optical performance.

Bad points
The lens barrel extends when focusing
Outline of the blur is visible at medium distances and beyond
Vignetting and vignetting on the side of infinity
Coma aberration is slightly noticeable
If there is anything to be wary of optically, it is the slight vignetting towards the corners of the frame. However, it is not a glaring fault that should be a problem, and for the majority of shots it is within the range of being negligible. In addition, there is also some vignetting and vignetting, but it is more modest than the Z MC 105mm F2.8.
The most important thing to be careful of is the extension of the inner tube. Due to the nature of standard macro lenses, it is difficult to keep a distance from the subject, and there is no denying the possibility of contact with the extended inner tube. It would be good to have a mechanism to protect the inner tube, such as attaching an external hood to the 62mm filter socket.


Conclusion
It is a standard macro lens that combines satisfying optical performance with portability, and can be used on a daily basis. This is a lens that makes the most of the advantages of compact, lightweight mirrorless cameras. If you are looking for a micro lens with serious, top-class optical performance, considering the price difference, we recommend the ‘NIKKOR Z MC 105mm f/2.8 VR S’, but for a lens that can be used on a daily basis for walking around, we recommend the Z MC 50mm F2.8.
Lens Buying Guide
Creating in-depth reviews like this requires time and resources.If you found this article useful and decided to buy a lens, please consider using the affiliate link. This will help us to create more content in the future.
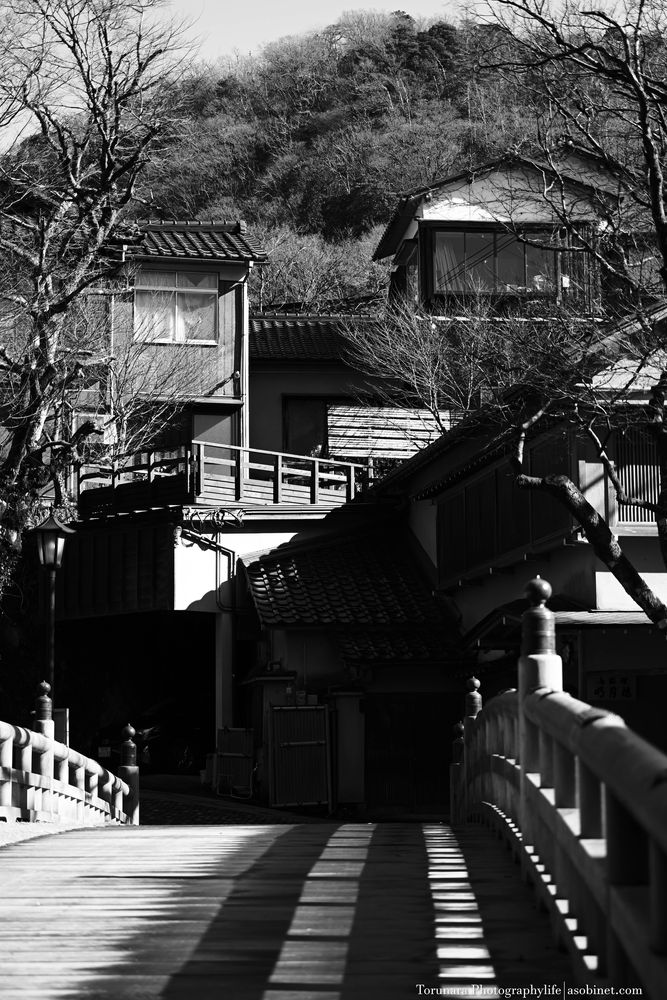
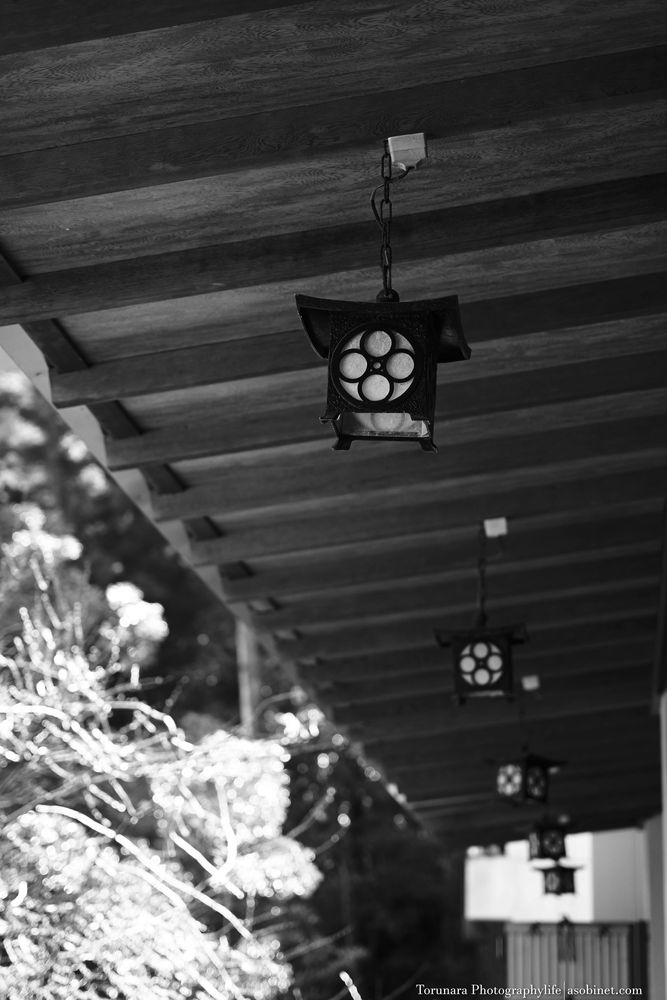
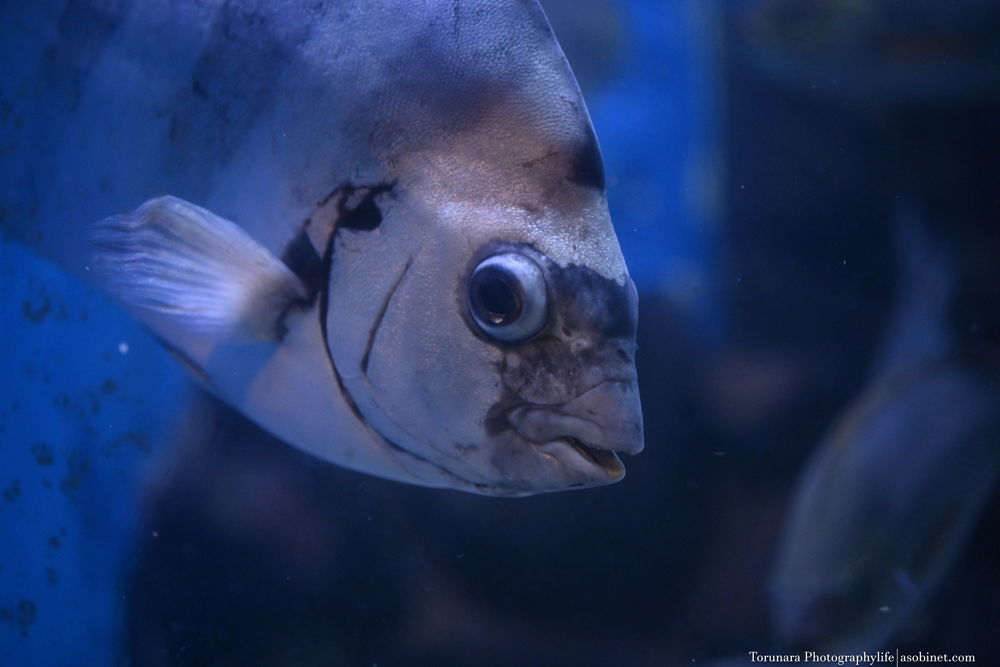
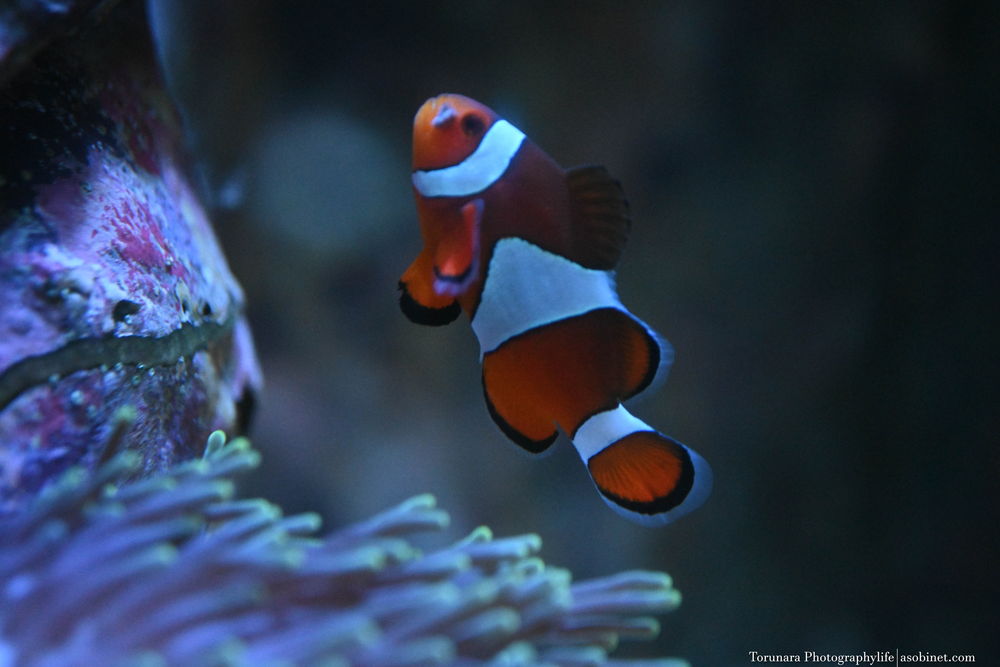
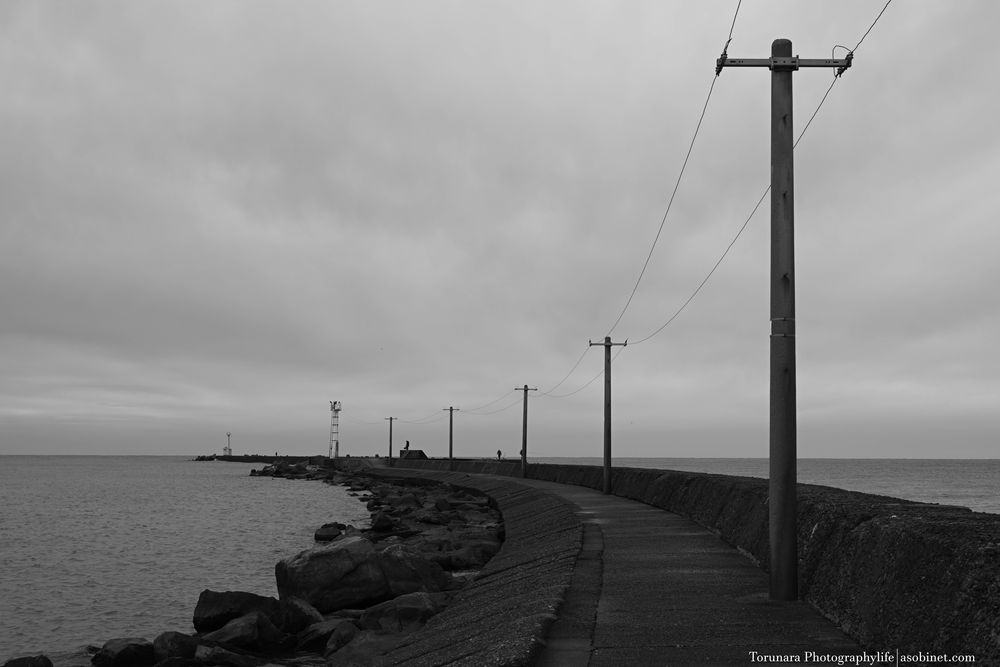
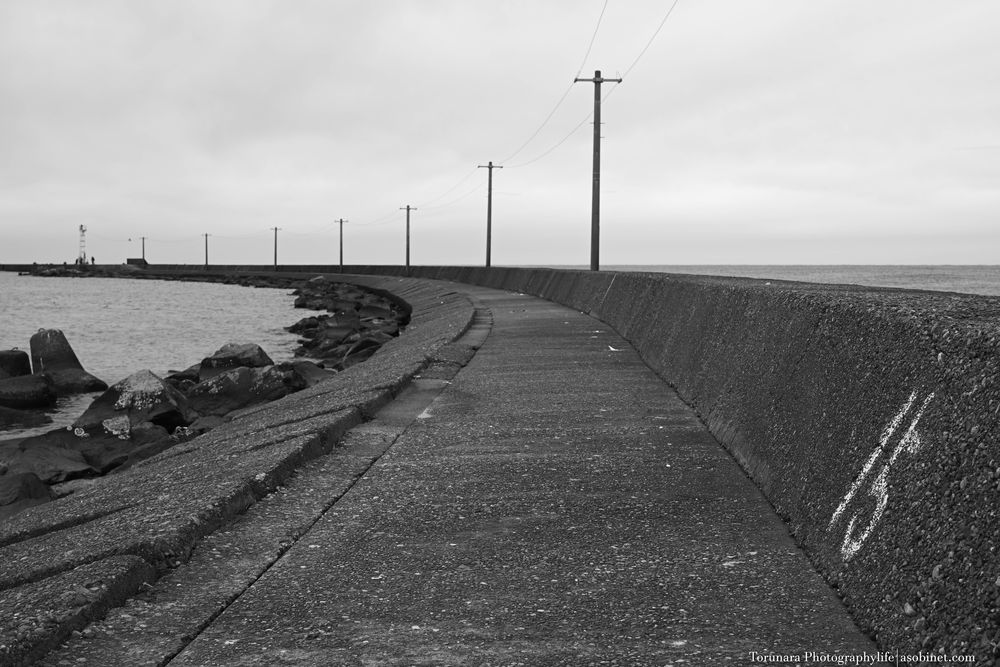
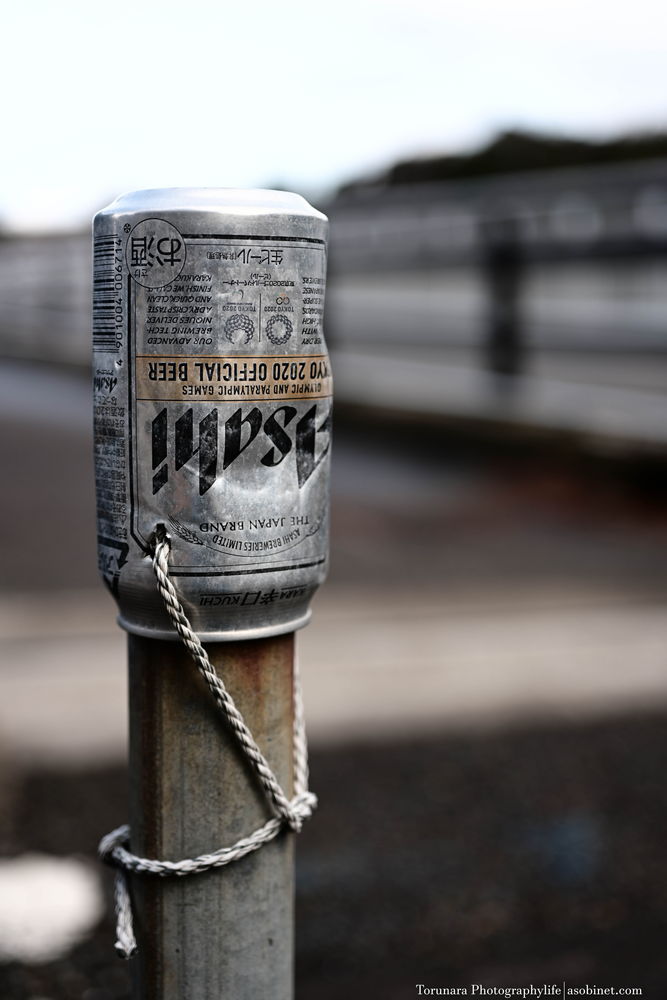
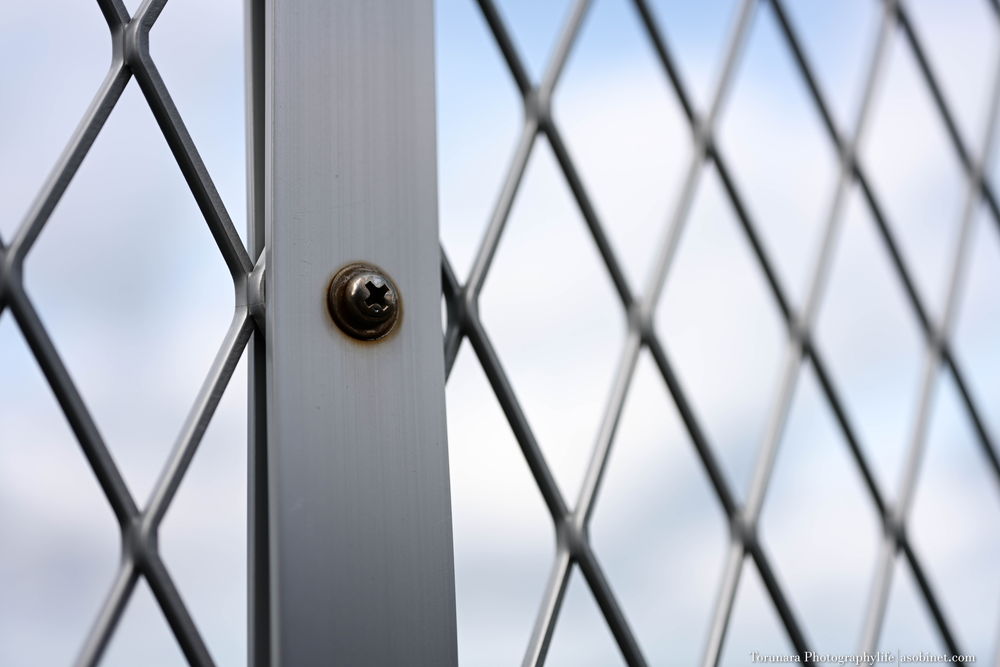
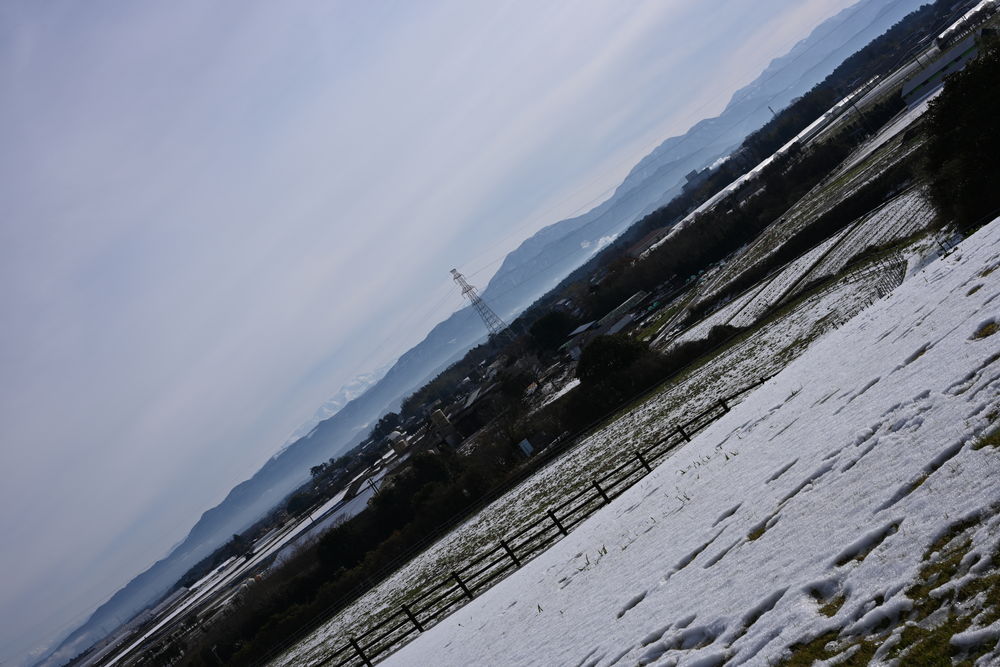
Example
The original data is available on Flickr.